
3 Experiment 1: Introduction to CHEM 1014, laboratory safety, and laboratory equipment
Jennifer Kopanic
CHEM 1014 is an introductory laboratory course at the University of Nebraska-Omaha that is to be taken concurrently with CHEM 1010: Chemistry in the Environment and Society. This lab provides students with opportunities to explore, learn, apply and practice the skills you learn in the lecture. Though this laboratory supports concepts learned in CHEM 1010, you also will have the opportunity to learn and apply skills that are unique to being in a chemistry laboratory. As such, students are expected to follow laboratory safety rules, demonstrate proper laboratory techniques for handling chemicals, and correctly use instrumentation, chemicals, and laboratory glassware. In addition, students are expected to not waste laboratory resources and to be respectful of others in the laboratory course.
The first laboratory activity is designed to promote your familiarity of the laboratory, to ensure that you are familiar with and understand safety in a chemistry laboratory environment, and to build a strong foundation for future laboratory experiences. Everything that is learned during this activity will be used in future laboratory activities and experiments.
Upon successful completion of this laboratory assignment, you should be able to:
- Identify standard laboratory glassware, apparatus, and equipment.
- Identify the function of standard laboratory glassware, apparatus, and equipment.
- Identify the safety rules that will be followed the entire semester in the laboratory.
- Identify the location and function of safety equipment in the laboratory.
- Explain how to handle common laboratory accidents.
- Define the purpose of SDS and determine where to find specific information, such as safety hazards, in an SDS.
Introduction to CHEM 1014
After the first week of the semester, the laboratory requires pre–laboratory work. Proper preparation is a critical aspect of laboratory safety and prevents poor performance in the laboratory. Students who are familiar with the experimental procedure are less likely to make costly errors, are less likely to cause accidents in the lab, are less stressed, are more likely to understand what is going on in the lab and the meaning of the laboratory results, and are more likely to confidently and smoothly execute the lab procedure. Students who prepare well and use time effectively finish earlier and stronger than those who are not prepared. Laboratory sessions have strict time boundaries; if you are not prepared, you may not finish your laboratory work in time.
The pre–lab assignments are always the same:
- Read the lab handout thoroughly.
- Upload the pre-laboratory report sheet to Canvas. Pre-laboratory work consists of completing the weekly pre-laboratory report sheet, which includes: 1) writing the objective of the laboratory experiment, 2) writing out the safety information for the laboratory, 3) writing a very brief procedure summary, and 4) answering pre-laboratory questions.
Purpose
The purpose of this laboratory is to introduce you to expectations that your instructor has for you while in the laboratory environment. These include following safety rules and laboratory notetaking skills as well as understanding resources, such as SDS, that are available to you to support you in being successful in the laboratory this semester.
In this lab, students will identify common laboratory items and complete an inventory for your assigned laboratory drawer. You will turn in a lab report today in the lab. Items that will be graded items are highlighted in bold font below.
Post-laboratory Quiz
In this laboratory course and others, the faculty and staff at UNO’s Chemistry Department take safety seriously. As such, there is a post-laboratory quiz that opens after the laboratory is completed and is due in a few days, please see Canvas for the exactly due date. The quiz addresses the syllabus, pre-laboratory work, laboratory worksheets, laboratory items, SDS, and safety. You may use the syllabus and the lab manual when you take the quiz. For this quiz, there is a 2–hour time limit, and you have one attempt to take it.
Part A: Laboratory worksheets
After today’s laboratory session, you will be expected to complete the pre-laboratory section of the laboratory worksheet for the weekly laboratory experiment. The pre-laboratory section of the worksheet is graded and is due at 11:59 pm the night before your lab is scheduled. This section of the laboratory worksheet includes the objective of the laboratory in your own words, a safety statement, a brief procedure summary, and the answers to pre–laboratory questions.
If your pre-laboratory section of the laboratory worksheet is not prepared on time, you will have to prepare it before you can begin the laboratory experiment. If you are not sufficiently prepared, your instructor has the discretion to assign a grade of a 0 for the lab and to not allow you to participate if there are safety concerns.
The laboratory worksheets are also a record of your work in the laboratory. Keeping accurate details and records according to the protocol is an expectation with ethical and professional ramifications. You will begin keeping records today in the lab. If you do not have access to the lab worksheets at the beginning of the semester, see your instructor for approved materials for you to document your work until you able to access the lab worksheets.
Use the information from this first laboratory activity to guide your preparation for each week’s lab throughout the semester.
Page Headings
The first page of the laboratory worksheet for the weekly experiment has a heading that must have the experiment number, the title, date, your full name, your drawer number, and your course and section number (e.g., CHEM 1014-001). If you work with one or more lab partners, you need to write their full name(s) in your page heading. For today’s laboratory experiment, you will leave the lab partner space empty, as you are working individually. Once you have been assigned a laboratory drawer, write the drawer number in the heading.
Page Footers
Once you complete your worksheet for the weekly laboratory, sign and date the page footer on the last page of the worksheet. If a witness or an instructor signature is required for the experiment, it will be explicitly stated in the laboratory experimental procedure. You will turn in your laboratory worksheet at the end of the laboratory. Sign and date the footer of the worksheet that you turn in today.
Objective
An objective, or otherwise called a purpose statement, must be included as part of your pre-laboratory work. The conclusion of the experiment ties back to this objective statement. Writing out the objective of the experiment is part of the pre–laboratory preparation grade. After the label for Objective in your lab worksheet, write the purpose of today’s lab in your own words. A formal purpose statement is always found in the laboratory procedure.
Safety statement
Safety for yourself and others in the laboratory must be considered before every laboratory experiment. Even if you are not handling chemicals or if the chemicals you will handle are not hazardous, you must include a safety statement to show that you have considered any and all potential hazards that are associated with the laboratory experiment. Potential hazards include broken glassware, open flames, high temperatures due to heating, and exposure to hazardous chemicals. Potential chemical hazards include chemicals being corrosive (strong acids or bases), toxic (poisonous chemicals), and/or volatile (easily vaporized chemicals). A safety statement is part of the pre–laboratory preparation grade.
What do you think the safety statement for today’s lab should be? After the label for Safety, write a safety statement in your lab worksheet.
Experimental Summary
You must write a very brief procedure for the experiment you are to perform. If there are many parts or sections of an experiment, be sure to clearly label each section. The more clear your work is, the easier it is for your instructor to assign points. After the label for Experimental Summary in your lab worksheet, write out the major steps of today’s lab. The Experimental Summary should have enough numbered bullet points and detail to demonstrate that you read and understood the experimental procedure.
Today’s procedure includes:
- Reviewing laboratory worksheet protocol
- Reviewing safety rules
- Drawing a safety map of the lab
- Learning about SDS and answering questions on SDS
- Identifying glassware and equipment
- Inventorying your assigned laboratory drawer
Data Collection
In this introductory laboratory course, your data will be recorded on your report sheet. If you choose to take additional higher-level chemistry courses, all measurement and observations are recorded directly in a laboratory notebook.
When you go to a balance to measure the mass of a chemical or equipment, take the report sheet with you and record the mass immediately. Never write the mass on a scrap of paper or call out the mass to a lab partner or attempt to remember it to record later. Do not remove the item from the balance until after the mass has been recorded on your report sheet. Include units and the entire number presented on the scale for the measurements you record.
Observations are also data that you need to record on your report sheet at the time of observing them.
Calculations
Show your work when you are prompted to do so. Include units in your work and in your final answer.
Discussion
The discussion section provides students with the opportunity to make sense of all of their experimental data, observations, and results. There will be a series of prompts or questions that can be used to guide your discussion in your lab report. Please use proper grammar, punctuation, spelling, and capitalization.
Conclusion
The conclusion section is an objective assessment of whether or not the purpose or objective of the experiment was met. In your conclusion, include evidence (data, observations, and results) to substantiate whether the purpose of the lab was met.
Feedback and Reflection
Most laboratory courses do not typically have a section used for regular feedback and reflection. These processes used by scientists and professionals in lab group meetings, [local, regional, national, and international] meetings, publications of scientific articles, and communications. As both feedback and reflection are important in science, in this lab course, you will have the opportunity to identify mistakes made during the lab, describe what you learned, and determine how the laboratory connects to the material covered in the lecture. In addition, you have the chance to provide feedback on the experiment or activity and how it might be improved.
Writing Utensil
Blue or black pen must always be used in your lab report. As pencil can be erased, it is not to be used in a lab notebook or lab report. Nothing in your notebook should be erased. If it is helpful, you may leave a pen in your assigned lab drawer.
Mistakes
We are all human and make mistakes. You will make mistakes in lab. You should take care and pride in your work and be as careful and thoughtful as possible, but the reality is that you will make a mistake in lab. Being honest about mistakes is an ethical requirement of laboratory work. Students must never obliterate mistakes from your lab report; scribbling out, erasing, or using white–out is not allowed and will result in a reduction of points from your lab report. Your laboratory report worksheet is a record of your work in lab; obliterating any information from your lab report is unethical. Data that you may think is a mistake may be needed later in your lab report. It is to be expected that students will make mistakes. An extremely neat lab report without any mistakes is cause for concern.
When you make a mistake, cross out the mistake with a single line. While your instructor is grading your lab report for neatness, both you and your lab instructor must be able to read your work. Take the time and care to legibly record all data, observations, and results. Illegible data will not receive credit.
Part B: Safety
Today in lab, students will review the safety rules with their instructor, sign the UNO lab safety agreement, and draw a map of the
laboratory room, showing the location of the safety equipment.
The Nebraska Medicine UNO Health Center, located at Room 102 in the Health & Kinesiology (H&K) Building ( 402-554-2374), is a resource for students who are injured in the lab. Minor burns (without blistering) and minor cuts (without the need for stitches) can be handled in the laboratory, as bandages, gloves, and a first-aid kit are available in the Chemistry Stockroom. In the case of a serious injury or if there is any uncertainty about the severity of an injury, UNO’s Campus Security should be called to assess the situation (402-554-2409). In case of an on-campus emergency, call 402-554-2911 or 911.
Major injuries, including a cut that requires stitches, a shard of glass embedded in skin, a server acid or base burn, or any injury to the eyes, require immediate attention. Nebraska Medicine UNO Health Center does handle some urgent injuries. After normal business hours, you may contact your personal physical or attend an urgent care facility.
The nearest urgent care centers to campus are:
Crossroads Urgent Care, 325 N 72nd St, Omaha, NE 68114 (402–715–5272)
Midwest Minor Medical Dodge, 8610 W Dodge Rd #2870, Omaha, NE 68114 (402–827–6511).
Students are responsible for all medical bills.
If there is a life–threatening event, such as a seizure or asthma attack, UNO Campus Security should be called immediately (402-554-2911). They will arrange for an ambulance and assist until it arrives.
UNO SAFETY RULES
A chemistry laboratory is a potentially dangerous place. The practices and policies are designed and enforced to promote safe conditions; your lab preparation and behavior must be consistent with them. You will be warned of minor infractions. Serious or repeated infractions or lack of awareness of these rules will lower your lab grade and may result in expulsion from the lab with loss of credit.
LABORATORY WORK
1. FAMILIARITY. Know what work you are to do. Use Safety Data Sheets to acquaint yourself with properties and hazards of chemicals to be used. Operate no equipment until instructed in its use.
2. BACK–UP. Have at least one other person in the laboratory with you when doing chemistry.
3. AUTHORIZED WORK. Perform only designated or authorized experiments using materials, amounts, and concentrations called for. Carefully read labels on stock bottles. Students in upper–level labs may work outside their scheduled period if they have back–up and their instructor’s specific, written permission.
4. PREEXISTING CONDITIONS. You are invited to inform your instructor if you have a health condition or disability that may adversely impact or be impacted by your work in the lab. You may wish to seek accommodation.
PERSONAL PROTECTION
5. EYES. Wear chemical–splash, high–impact protective goggles while anyone in the lab is working with chemical reagents. Prescription glasses (unless deeply tinted) or contact lens may be worn under goggles.
6. SHOES. Wear fully closed shoes offering spill protection to the entire foot.
7. CLOTHING. Wear sufficient clothing to protect your skin against splashes, covered down to the shoe and free of rips and tears. Avoid clothing that is too tight to remove quickly. You may wear a lab coat to protect skin and good clothing. Avoid flammable and dangling clothing. Wear a protective apron and face shield when exposure could be severe.
8. HAIR. Confine loose hair sufficiently for safe work, especially near flames and centrifuges.
9. WASHING. Wash your hands with soap and water directly upon leaving the lab.
EQUIPMENT
10. FUME HOOD. Confine all sources of irritating mists or vapors to a fume hood in the lab room.
11. SAFETY EQUIPMENT. Locate and use appropriately: eyewash (splash or eye irritation), shower (broad splash, severe burn, or burning clothes), bicarbonate (acid spill), dustpan and brush (broken glass), campus telephone (medical emergency), extinguisher (localized fire), sand (metal fire), and fire alarm (big fire).
PREVENTIVE PRACTICES
12. COATROOM. Leave coats and other personal belongings (e.g. backpacks and purses) in the coat room.
13. WORK AREAS. Keep your work areas clean. Clean up a spill or breakage before continuing work.
14. TASTING. Leave beverages and snacks outside the lab, even if in closed containers. Drink no water and eat no ice in or from the laboratory. Never taste a laboratory chemical.
15. SMELLING. To note an odor, start with the container well away from the face. Waft air towards your nose and move the container closer only if you detect no odor.
16. GLASSWARE. Use glassware only if free of cracks, breaks, and sharp edges. Avoid strain assembling glassware. Lubricate thermometers and tubing for insertion through a stopper; use an insertion tool.
17. CHEMICALS. Leave chemical solutions, materials, and equipment in the lab. Dispose only as directed.
ACCIDENTS * * * * In all cases notify the instructor immediately. * * * *
18. BROKEN GLASS. Dispose of broken glass in the designated box in the lab or stockroom, not in paper trash.
19. EYES. Go immediately to an eyewash to flush chemicals from eyes with water. Continue at least 15 minutes.
20. BURNS. Flush skin with a COPIOUS quantity of cold, running water if burned by chemicals or hot equipment.
21. MINOR INJURY OR ILLNESS. Go to Nebraska Medicine UNO Health Center in the H&K Building if injured or feeling faint or ill, with escort if appropriate.
22. MAJOR INJURY. Refer major injury immediately to Campus Security by calling 4–2911. Payment for medical transportation and treatment is the sole responsibility of the student. By signing below, the student accepts this responsibility. HS provides insurance information.
23. MINOR FIRE. If reasonable, use a wet towel or other means to smother or otherwise contain a fire.
24. MAJOR PROBLEM. Evacuate the lab in case of persistent fire or use of the safety shower, unless you are being treated or assisting in treatment. Call Campus Security at 4–2911.
Part B Procedure:
1. Find the label Part B Safety in your lab report worksheet.
2. Find the title Safety Map and write the room number of the lab.
3. Draw a large rectangle in your lab notebook which will serve as the outline of the room.
4. Use as much of the page of the lab notebook as you can.
5. Label where the blackboard(s) is (are) and where the windows are.
6. Identify the location of the listed safety equipment/items on your map by name and letter. You do not need to draw each item, nor do you need to draw any other items in the lab, except the blackboard and windows. The locations need to be correct with respect to the blackboard and windows to receive credit.
7. If an item is not in the laboratory, include it on the map and specify where the item is.
A. The safety shower and hand–held shower
B. The eyewash
C. The exits (identified by signage)
D. The gas cut–off switch
E. The fire blanket (some labs lack this)
F. Bucket of sand to extinguish metal fires
G. The fire alarm (not in the lab – state where it is)
H. The fire extinguisher
I. The sharps waste container
J. The broom(s), dustpan(s), and brushes
K. The fume hoods
L. Bicarbonate for an acid spill
M. The list of emergency procedures
N. The telephone and the number to call in an emergency (write the number on the map)
Part C: SDS
Safety data sheets or SDS are documents that are provided by the manufacturer of a chemical for guidance to those who handle that chemical. Referring to an SDS represents the best practice for obtaining information about the hazards of a given chemical. SDS contain helpful information such as first aid and proper storage. SDS can be accessed online and throughout the semester you will be required to access online versions of SDS to determine the hazards of chemicals you. Furthermore, paper copies of the SDS are available for inspection in the chemical stockroom. SDS have a consistent format with 16 sections. Each section is dedicated to specific information. For example, Section 1 lists identification information about the chemical including synonyms (alternate
names) and any restrictions on its use. The most useful SDS section for CHEM 1144 is for beginning chemistry students is Section 2 which lists the known hazards of a chemical. Section 2 is where a hazard pictogram may be found.
PART C PROCEDURE:
1. Label a section Part C SDS in your lab notebook.
2. Write the title SDS Questions in your lab notebook.
3. Obtain the SDS of a chemical known as sodium hydroxide as well as the OSHA Quick Card
Hazard Communication Standard Pictogram.
4. You do not need to write the question but include the question in your answer so that the
information has context.
5. Number and write each answer in your laboratory notebook.
Sds Questions:
1. Write a synonym for sodium hydroxide. The synonyms for a chemical are found in Section 1.
2. Are any restrictions of use listed for sodium hydroxide? Restrictions of use are found in Section 1.
3. List two hazards of sodium hydroxide. The hazards of a chemical are summarized in Section 2.
4. Is there a pictogram listed in Section 2 of the SDS? If so, what hazard(s) does it represent?
Part D: Laboratory Item Identification and Check-In
You will use laboratory glassware for almost every laboratory experiment or activity. Knowing the name of a given piece of glassware and its function is required to avoid costly mistakes and to make the best use of time. For example, beakers are not used to measure volume and graduated cylinders are not used as reaction flasks. The glassware that you use most frequently is in the lab drawer. Drawings of laboratory equipment with their name and function are found on pages 10 – 12. There are also resources in Canvas to familiarize yourself with labware names and functions.
Part D Procedure:
1. Label a section Part D Lab Item ID and Check In your lab notebook.
2. If you haven’t done so already, write your lab drawer number in the heading of your lab notebook.
3. Introduce yourself to the other members of your bench.
4. Write the first and last name of the members of your bench in your lab notebook.
5. Your lab instructor will hand out cards with names of laboratory items. Work together to place the cards on the correct items on your bench.
6. As necessary use the sketches in Table 1, pages 10 – 12, to assist you in identification.
7. Once your group has identified each item ask your instructor to check your identification.
8. Once your instructor has checked the item identification, check out your drawer by referring to the photo and checklist of items in your drawer which is on page 9.
9. If you are missing an item, check the lab “lost and found” table. If the missing item is not there, go to the Chemistry Stockroom to obtain any item(s) you are missing. Wait until you have checked your entire drawer before going to the stockroom.
10. Once your lab drawer inventory is complete, ask your lab instructor to initial your lab notebook.
11. Write a statement that inventory was completed.
Discussion
Label a section for Discussion and answer these prompts. You do not need to write the question but
include the question in your answer, if possible, so your answer has context.
1. The remainder of the laboratory experiments have pre–lab assignments. List the three pre–lab assignments.
2. Identify what section of an SDS gives information about hazards of a chemical.
3. Sketch and label a graduated cylinder and a beaker.
4. State the function of a graduated cylinder and the function of a beaker.
Conclusion
Label a section for Conclusion. State whether each purpose was met with a summary (two or three
sentences) of today’s activity. Use evidence to support your statement. Correct grammar, spelling,
capitalization, and punctuation are necessary for full credit.
Feedback & Reflection
Label a section for Feedback & Reflection and identify what you learned and how you think this
introductory lab might be improved.
Handing in the Lab Report
The lab report that you turn in consists of the information that you recorded in your lab notebook. Turn
in the carbon copy, or the yellow pages, to your instructor. Be sure that the headers and footers are
complete. The original white pages stay in your lab notebook. Points will be deducted if you turn in the
original pages of the lab notebook. If you don’t have a lab notebook yet or the yellow pages are illegible
you may upload photos (in one document) of your work in Canvas. If you turn in your lab report during
lab, Canvas may flag your report as “missing.” Be aware that your report isn’t really missing, but Canvas
thinks it is missing since you didn’t upload a report.
Your instructor may prefer you to turn in your work through Canvas. Defer to your instructor’s
preference for turning in lab reports (in person or through Canvas).
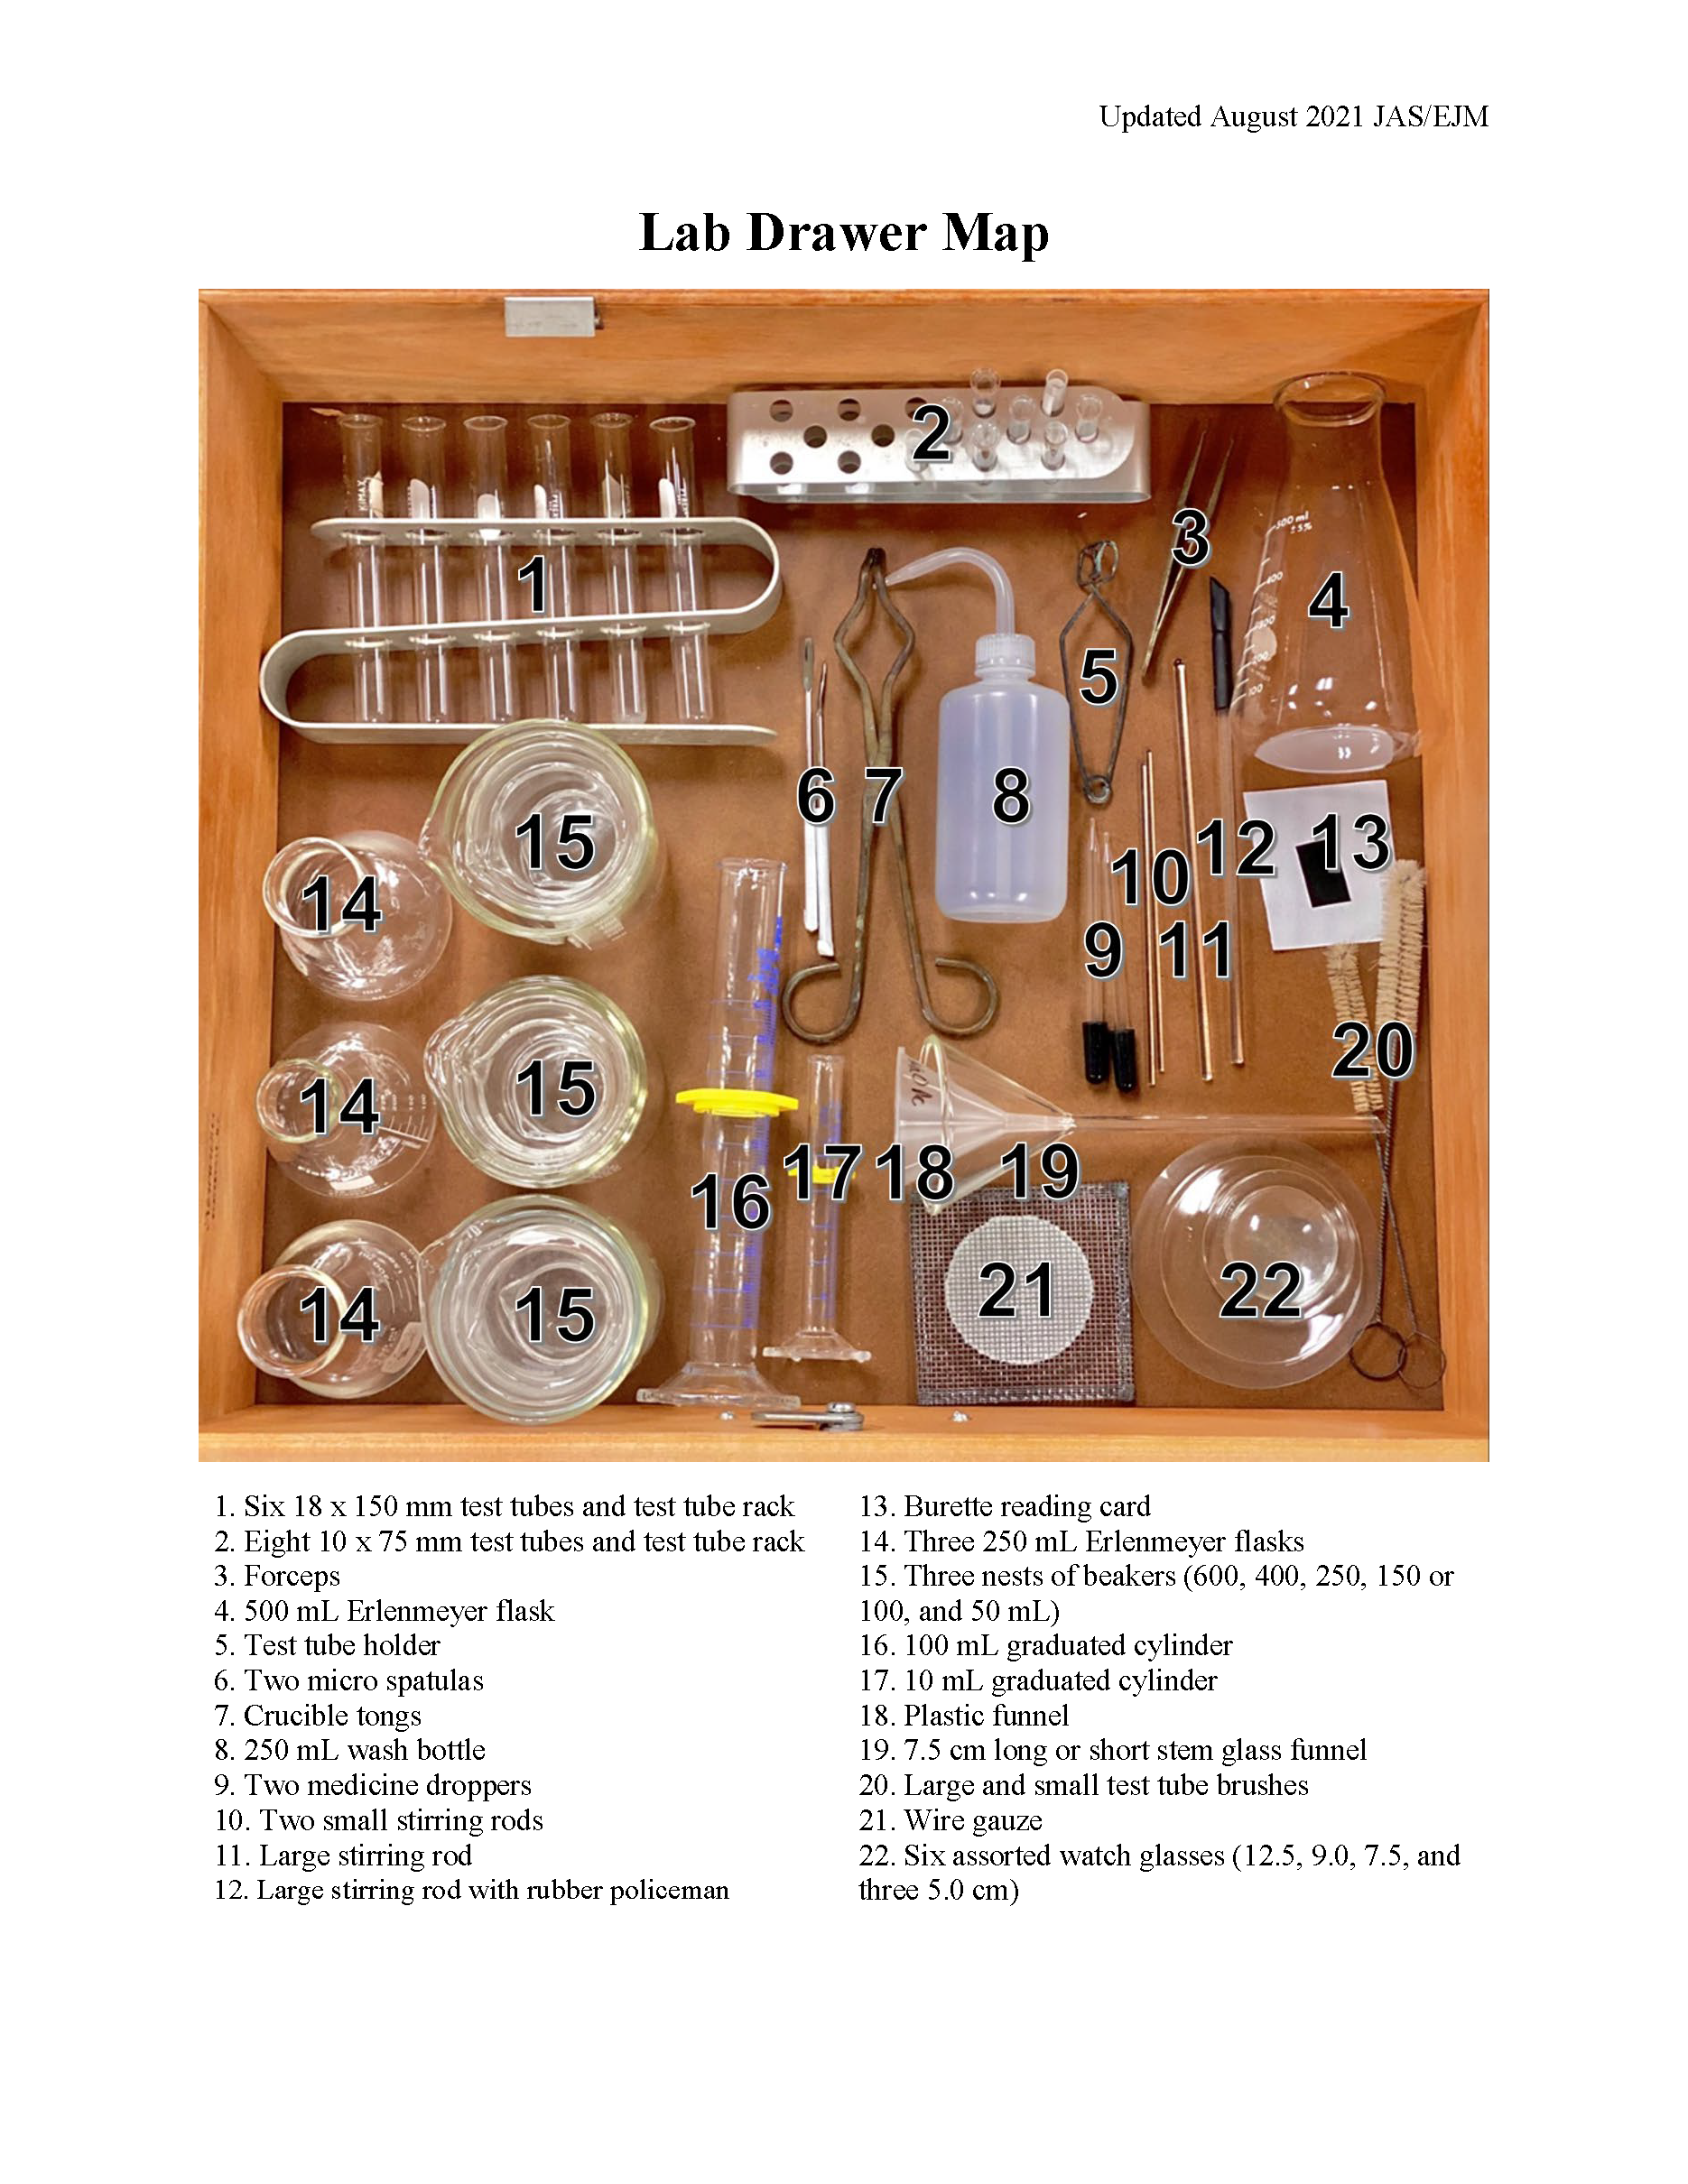
Table 1 Lab Equipment, Apparatus & Glassware
| COMMON GLASSWARE AND EQUIPMENT ENCOUNTERED IN THE CHEMISTRY LABORATORY | ||
| Name | Picture | Use |
| Beaker | 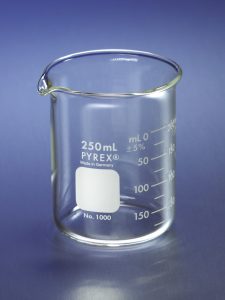 |
Used to hold and heat liquids. Multipurpose and essential in the lab. |
| Bunsen burner |  |
Used for heating and exposing items to flame. |
| Crucible tongs | 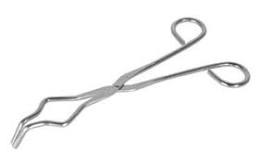 |
Used to hold crucibles, evaporating dishes, and glassware when they are hot. |
| Digital thermometer | 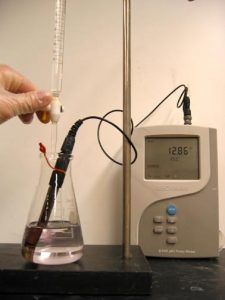 |
Used to take temperature of solids, liquids, and gases. |
| Disposable transfer pipette | 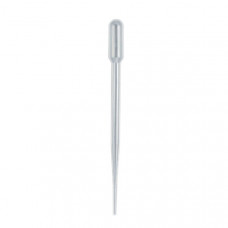 |
Used for moving small amounts of liquid from place to place. They are usually made of plastic and are disposable |
| Electronic balance | 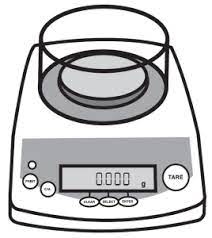 |
Used for weighing substances or objects, usually in grams. |
| Erlenmeyer flask | 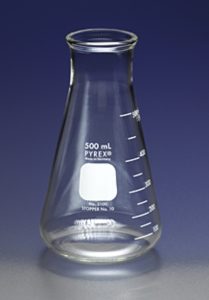 |
Used to heat, mix, and store liquids. The advantage to the Erlenmeyer Flask is that the bottom is wider than the top so it will heat quicker because of the greater surface area exposed to the heat. |
| Forceps | 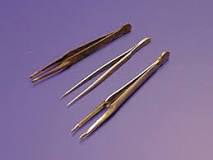 |
Used for picking up and moving small objects. |
| Glass funnel | 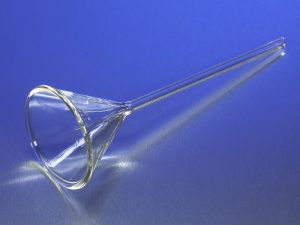 |
Used to pour liquids into any container so they will not be lost or spilled. They are also used with folded filter paper for filtration. |
| Graduated cylinder | 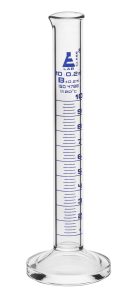 |
Used to measure the volumes of liquids. |
| Hot plate | 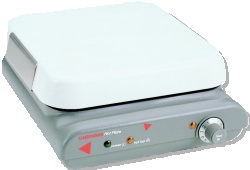 |
Used for heating substances and liquids in beakers and flasks. |
| Medicine dropper | 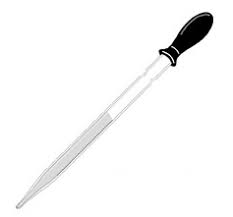 |
Used to add drops of a liquid. |
| Microspatula |  |
Used for moving small amounts of solid from place to place. |
| Mortar and pestle |  |
Used to crush solids into powders for experiments, usually to better dissolve the solids in a liquid. |
| Parafilm | 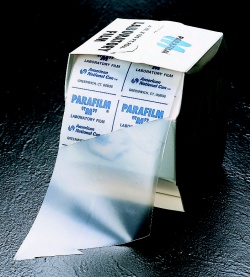 |
Used to cover a piece of glassware. |
| pH paper | 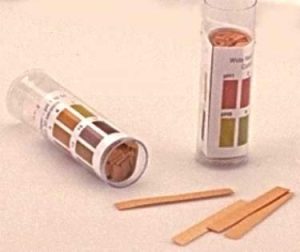 |
Used to measure the pH of a liquid. |
| Plastic funnel | 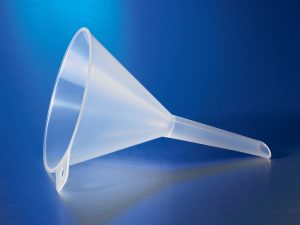 |
Used to pour liquids into any container so they will not be lost or spilled. |
| Ring clamp | 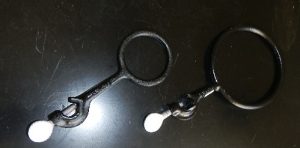 |
Used to hold items being heated. Clamps or rings can be used so that items may be placed above the lab table for heating by Bunsen burners or other items. |
| Ring stand | 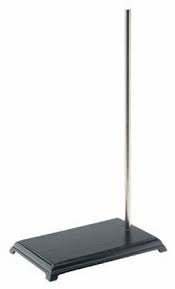 |
Attached to ring stand and with wire gauze used to hold beakers or flasks while they are heated by a gas burner. |
| Rubber stoppers | 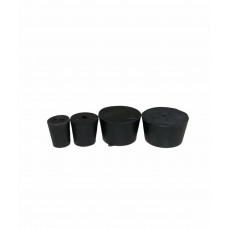 |
Stoppers come in many different sizes. The sizes are from 0 to 8. Stoppers can have holes for thermometers and for other probes that may be used. |
| Scoopula | 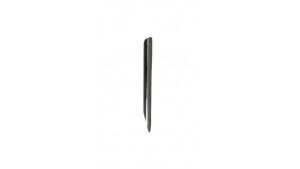 |
For scooping out small or large amounts of chemicals from bottles. |
| Stir bar | 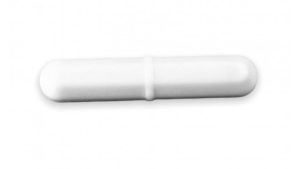 |
Used to stir mixtures in a beaker with a stir plate. |
| Stir plate | 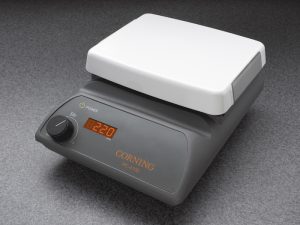 |
Used to stir mixtures in a beaker with a magnetic stir bar. |
| Stirring rods | 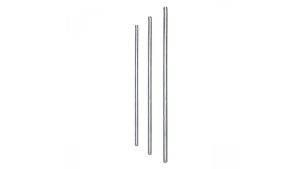 |
Used to stir liquids. They are usually made of glass. |
| Stirring rod with rubber policeman | 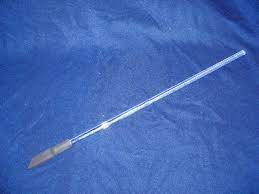 |
Used to scrap solid precipitate from a beaker to a funnel. |
| Striker | 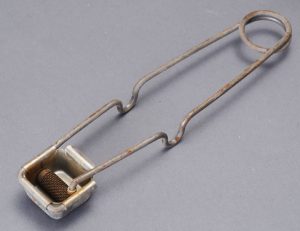 |
Used to light a gas [Bunsen] burner. |
| Test tube | 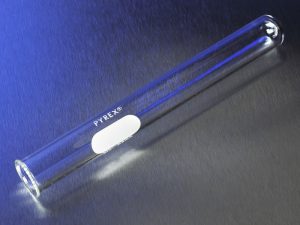 |
Used for storing, mixing, and heating small amounts of chemicals. |
| Test tube brushes | 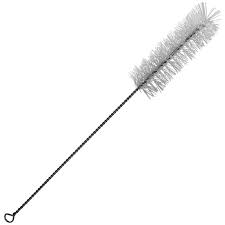 |
Used to easily clean the inside of a test tubes and other glassware. |
| Test tube holder | 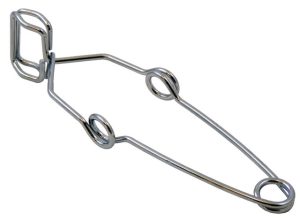 |
Used to hold test tubes while heating. |
| Test tube rack | 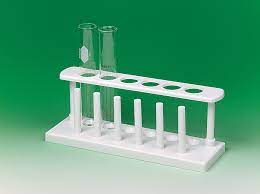 |
Used to hold test tubes while reactions happen in them or while they are not needed. |
| Utility clamps | 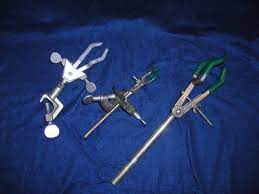 |
Used to attach test tubes and other glassware to a ring stand. |
| Wash bottle | 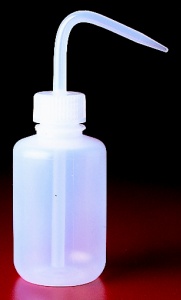 |
Used to wash or rinse other containers. |
| Watch glass | 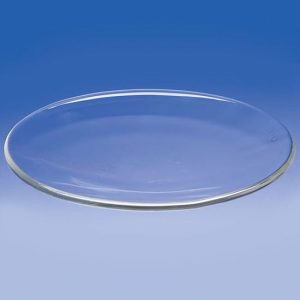 |
Used to hold solids when being weighed or transported. They should never be heated. Can also be used to cover beakers or other containers. |
| Weigh boat | 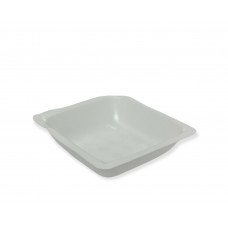 |
Used for weighing solids on a balance. |
| Wire gauze | 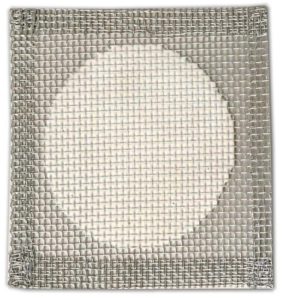 |
Used with a ring clamp to support glassware over a Bunsen burner. Spreads flame out for more even heating. |

Feedback/Errata