
1
Cost: less than $10.00 Difficulty: Low Time: 1 Hour Continuous: Yes (several weeks)
Summary:
Students learn the basics of how plants grow. How to grow seedlings. Growing starter plants in a soilless environment. Students will grow basic plants in their own homemade green houses. This project is completed over a week to several weeks. Can be done in conjunction with other projects.
ELO’s – Agricultural Science, Life Science, Plant Science, seeds, life cycle, observation, discussion, building a hypothesis, critical thinking.
Supplies needed:
· Paper or construction paper,
· markers or crayons,
· Ziploc bags,
· cotton or paper towels,
· tape,
· a pen,
· a stapler.
· Paper and pen (for students).
· A bowl of water, or large cup, or a spray bottle with water or dampening the cotton balls or paper towels.
· Seeds of your choice
Activity
1) Buy basic plant seeds from store. These plants will grow with the least amount of effort. If you have never grown anything before, I would recommend beans. They are almost bullet proof. Seeds are generally measured by weight not quantity. You can buy a 2 ounce bag of bush beans for about $3.58 which will give you about 150 of them. More than enough for your group. Other seeds vary by weight and number and sometimes can be very misleading to how many are inside. Do some research first before picking seeds or try the experiment for yourself (recommended seeds to choose below).
Here is a list of seeds I recommend for starters:
· Green Beans. …
· Lettuce….. (easy to grow, but challenging to transplant due to size)
· Cucumbers. …
· Spinach. …
· Tomatoes. …
· Flower seeds (marigolds)
Pro-tip: Allow the seeds you plan to use in class to soak in water up to 24 hours before doing this activity.
Soaking seeds prior is important, due to the shell of seeds are generally hard, and will sprout faster if softened a little bit. When exposed to the environment where it commonly rains or is warm, nature does this for us. Since we are growing seedlings in a closed environment this will help considerably. Gardeners generally soak their seeds to increase the speed of seedling growth at the beginning.
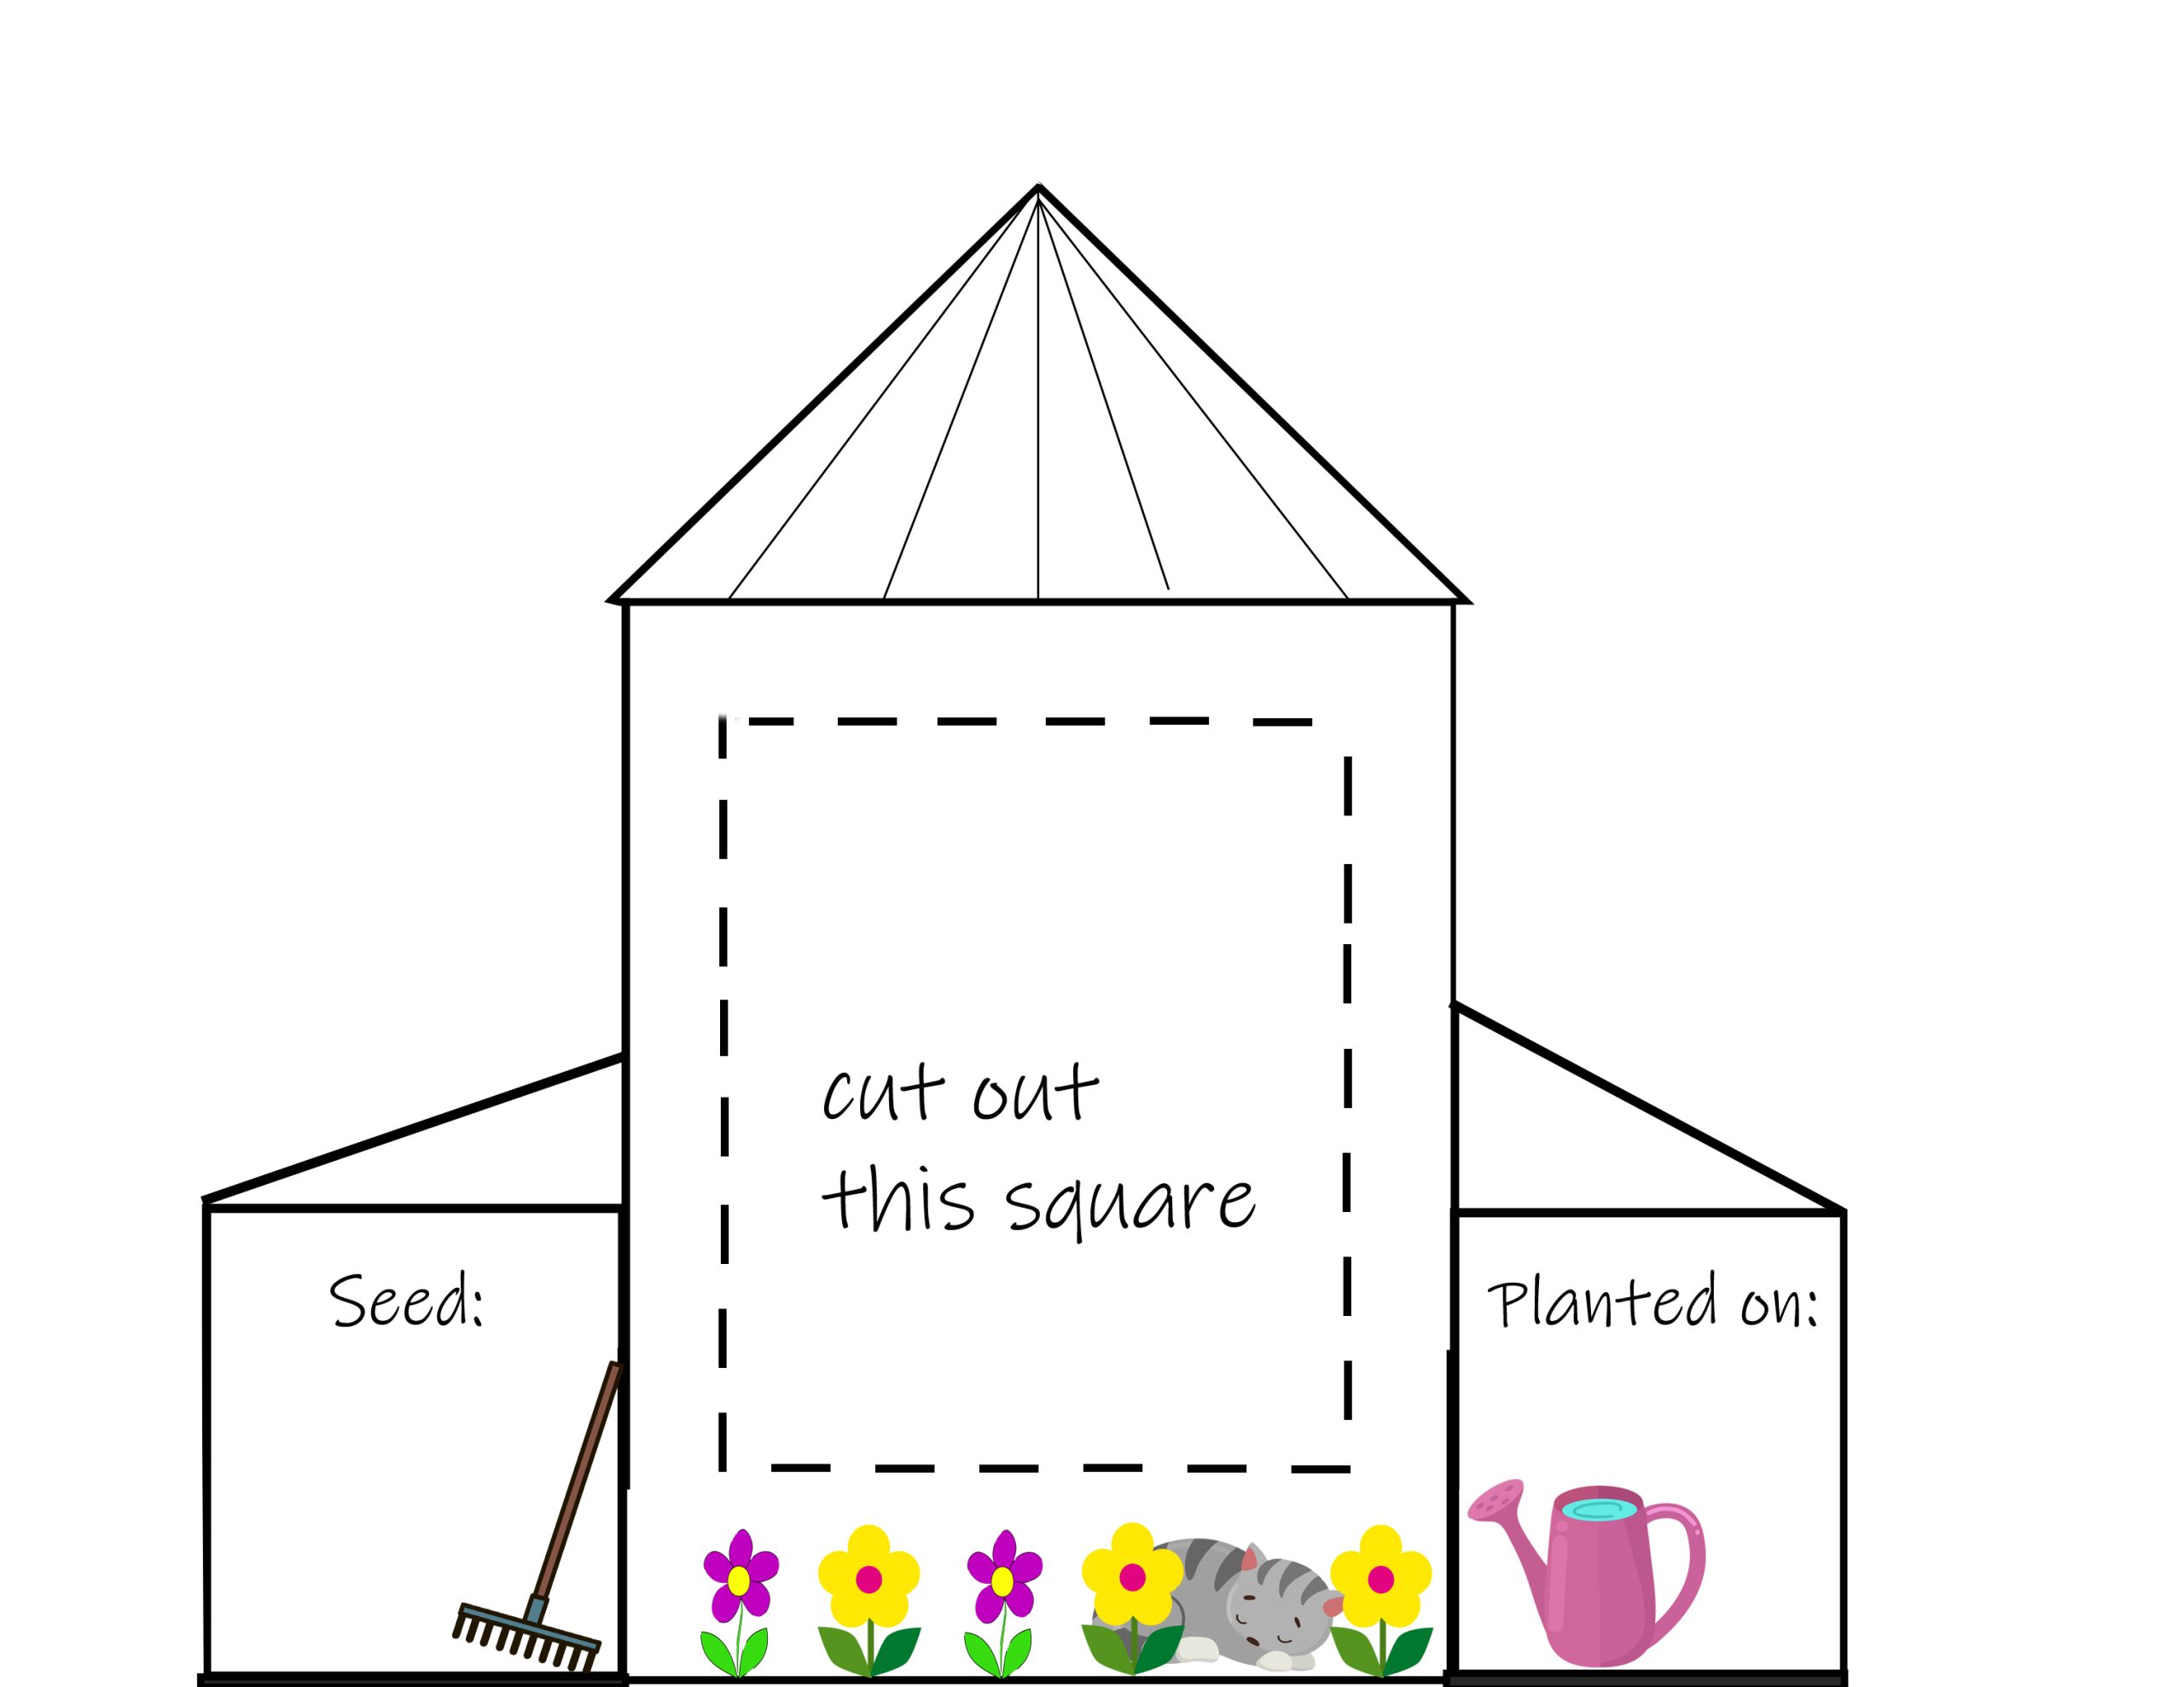
2) Cut out a similar house-shaped templates as shown in the picture for each student. This house outline will be stapled to the Ziploc bag the students’ seeds will be placed inside. The important things to write down on each greenhouse template are the student’s name at the top Grace’s Greenhouse (replace with the actual student’s name), the “date” in which the seed was planted at the bottom, as well as what type of seed was planted for reference. This is so students can observe change as well as remember when the seeds were actually planted.
3) Explain the activity to your students as well as the importance of growing plants for our survival. The amount of time it takes for a plant to grow is something students may not consider when they go to the store with their parents and buy an apple or use common goods. Pass out the template Greenhouses for students to: write their name, today’s date, and for them to decorate the greenhouses however they wish.
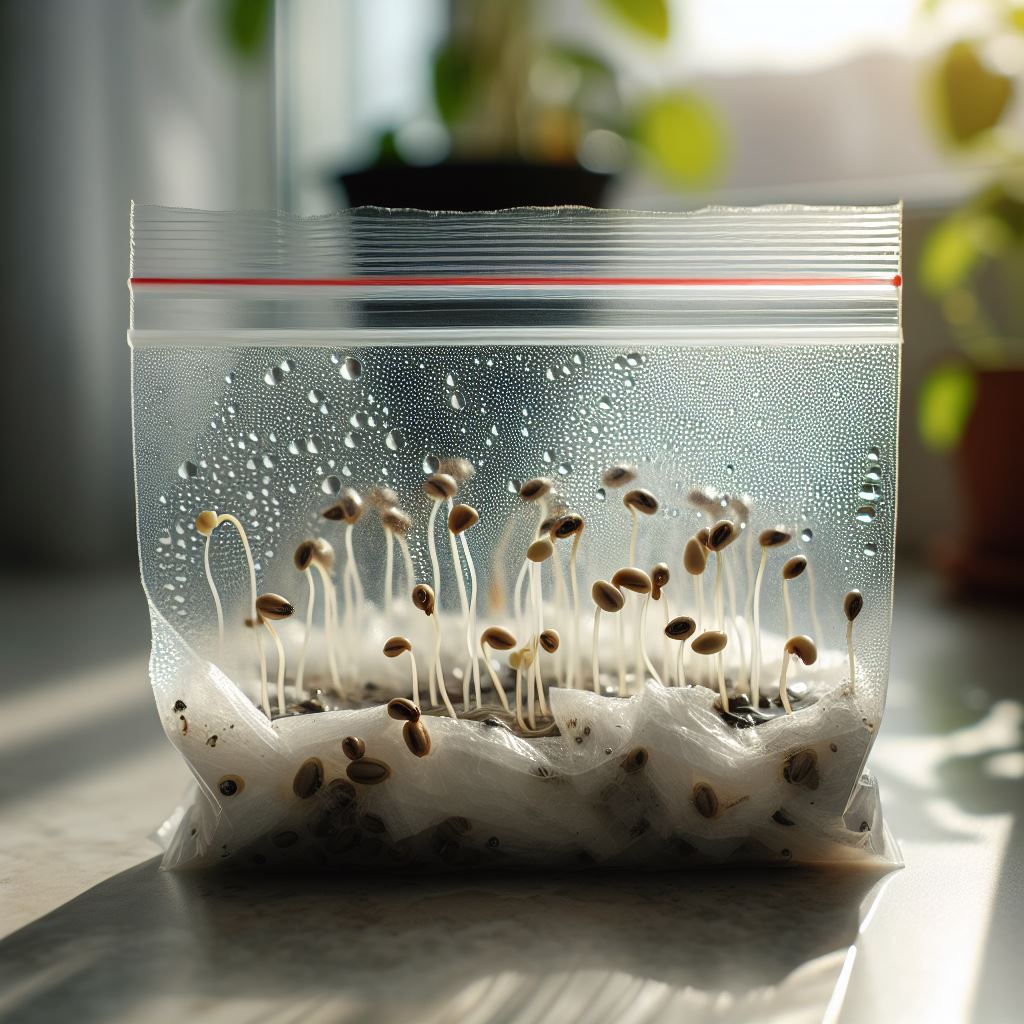
4) Take out the seeds you let soak for 24 hours prior to doing the activity. Pass out 3 cotton balls or one paper towel to each the students. Have the students insert the seed into the cotton balls and then moisten them before putting them into their bags.
Pro-tip: Sometimes seeds are duds.
Having at least 2 seeds together prevents the risk of a student’s greenhouse not having any rewards if a dud seed occurs. Occasionally this information is written on the seed packet, however it is not always. Gardeners typically do this and then thin out seedlings if multiple seeds do end up growing. Again, paper towels or cotton balls should be moist, there shouldn’t be a small swimming pool in the bags.
5) Seal bags and place them behind the Greenhouse frame as shown, staple the bags at the top corners of the house. Be careful not to staple through a seed in a bag.
6) During spring, summer, or fall the bags can be placed immediately into a sunny window for sprouting. If it is winter or still generally cold outside I would recommend initially putting them in a dark warm place for germination until they sprout. Then you can hang them from the window for observation.
7) Seeds will generally sprout within a week or so depending upon Some take longer.

Greenhouse Discussion:
Have students write or draw what they observed on a day-to-day basis. How much growth occurred? (This could be measured.) The parts of the seedling. Students can describe what their seedlings look like, the parts of a seedling and how much growth occurred or the difference in growth if different windows were used. Discuss with the students what may have caused the difference in growth besides the different types of seeds if different seeds were used. If all the seeds were the same, how was the amount of sunlight different in each window? Heat, etc.?
At the end of the project, allow students to take their projects home. It will allow them to talk to their family members about what they learned. Children often like to share their achievements with friends and family members. If you intend to keep students’ plants long term (after about 2 weeks or so) to continue observation, they should be removed from baggies and then transplanted into disposable red cups. See the next section about Transplanting your Greenhouses and Plants.
Pro-tip: Extended growth of large seedlings in baggies are prone to mold and rot since the bag is sealed.