
16 Digital Learning Center Exam Commons User Guide
OVERVIEW
Guide Introduction
Testing Technologies
Online Testing Applications
DLC Exam Requests
Schedule an Exam
Schedule a Makeup Exam
Manage Existing Requests
Manage Access
Student Registrations
How to Schedule a Request for a Student Not Currently in a Course
Canvas Quizzes
Creating a Canvas Quiz
Create a Question
Linking Digital Materials into Questions
Question Banks
Question Groups
Preview Your Quiz
Quiz Settings
Quiz Instructions
Quiz Options
Quiz Restrictions
Hiding Quiz Scores from Students
Publish a Quiz
Using Announcements to Link to a Quiz
Copy a Quiz for a Remote Proctor
Adding Extra Time for Students with Accommodations
Giving a Student an Additional Attempt
Extending Exams for Some or All Students
Quiz Statistics
Mobius Assessments
For More Information
Guide Introduction
This guide will detail how to schedule your exam request through the Digital Learning Center (DLC) website, as well as guide you through the entire process of using Canvas to create and deploy quizzes. While Canvas is a great choice for online testing, instructors also have the option to use Mobius Assessment (an LTI that plugs into Canvas). For those who wish to use Mobius Assessment, please see the additional resources at the end of this guide.
Testing Technologies
- The Exam Commons provides a large-scale, web-based assessment service for University of Nebraska-Lincoln instructors. Any UNL instructor is able to fill out and submit an exam request on http://dlc-reserve.unl.edu, which is the first step for any type of testing in our center.
- We have two locations. The first is the Exam Commons in the Adele Coryell Hall Learning Commons, which is our flagship online testing center service for students and has 174 testing stations. The East Campus Exam Commons (EC2) in the Dinsdale Family Learning Commons is a satellite location of the Exam Commons and has 36 testing stations for students. During the timeslot registration process, students are able to pick their testing location.
- After submitting an exam request, the instructor is then responsible for creating and setting up their online tests in the platform of their choice. At the present, we support these platforms for academic course testing:
- Canvas quizzes (native to the Canvas LMS)
- Mobius Assessment (a LTI plug-in that connects to the LMS)
- The DLC also facilitates WeBWorK and ETS Major Field Test exams on a smaller scale for pre-approved courses. Please contact the manager ahead of time if you are considering using one of these platforms.
- Instead of passwords, our testing facility utilizes IP restrictions. In Canvas or Mobius Assessment, select the filter titled “UNL Testing Centers.” This filter includes all computers in the Digital Learning Center (DLC) and in the Services for Students with Disabilities (SSD) testing center. If a student tries to access an IP restricted exam outside of one of these locations, they will get an error message and be unable to proceed.
- Since staff do not need to enter passwords for students, they do not need to be stationed in the physical testing space. Instead, they monitor the testing students for signs of academic dishonesty with two forms of security software.
- ABTutor is a lab monitoring software that rotates through a thumbnail view of all of the computer screens in the Exam Commons. The student workers are able to use this to take screenshots, monitor screens and assist students remotely. This software also has a URLs Blocked list, which is a group of popular search engine, knowledge, and email sites that we have blacklisted on the machines.
- Avigilon is the video surveillance system that allows staff to watch the live cameras in the Exam Commons. This software allows staff to monitor for physical forms of academic dishonesty, such as students utilizing notecards which aren’t allowed. Staff are also able to access old footage upon instructor request from the past 30 days.
Online Testing Applications
Though Canvas quizzes and Mobius Assessments are very commonly used in the DLC, they can also be implemented for use in other environments.
- Take-Home Exams
- These exam types can be created without a password or IP restrictions set as take-home exams. Instructors can also use Respondus LockDown Browser and Monitor for take-home exams. For more information about this, see the next section of this PressBook.
- In-Class Exams
- Some instructors request that students bring their laptops to class for in-class testing using forms of web-based assessment. For this, no password or IP restrictions should be set, but the exam’s availability should only be set for the exact day and time of the in-class exam.
- Remote Proctoring
- A copy of a Canvas quiz or Mobius Assessment must be created and then several settings changed for students to access those exams in remote locations. Later on in this guide, details will be provided about making these adjustments in Canvas and Mobius Assessment.
Schedule an Exam
Scheduling an exam is the first part of the exam process, and it’s important that you reserve your dates in our system when enough availability remains. You may start reserving dates for an upcoming semester 45 days before the first day of the upcoming semester. To schedule an exam:
- Log into DLC-Reserve (https://dlc-reserve.unl.edu)
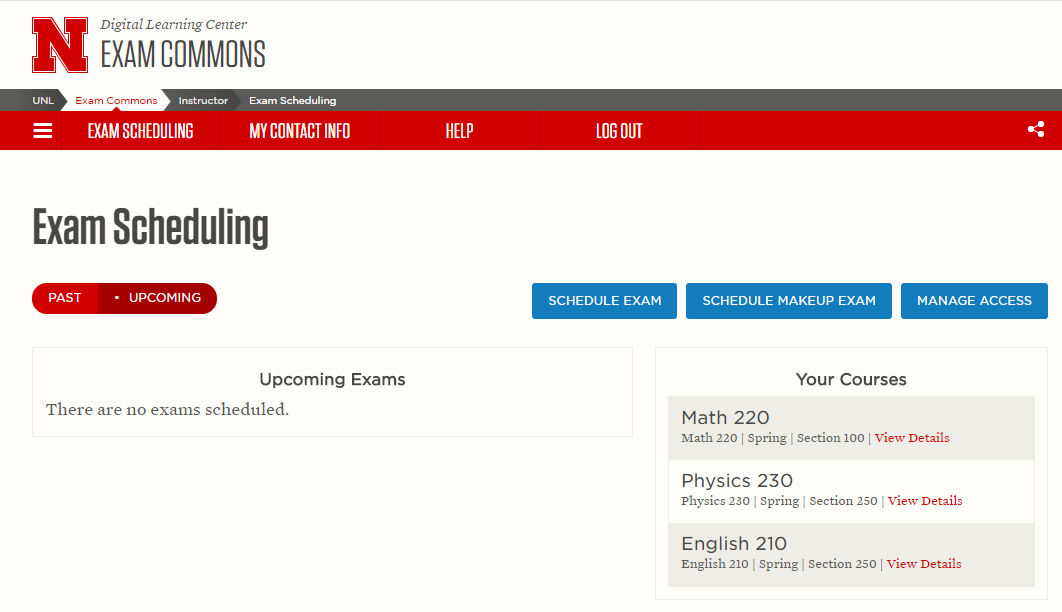
- Click “SCHEDULE EXAM” to begin creating your testing reservation:

- Click the courses field to pull up a list of your courses. Click as many courses/sections as you wish to include in this exam request.
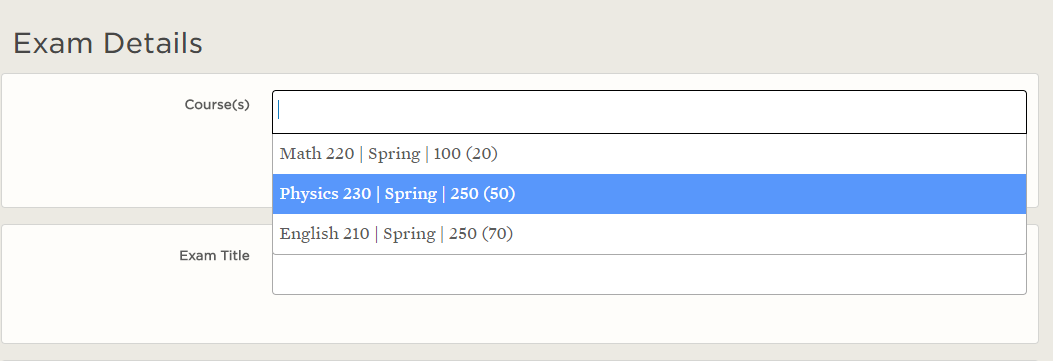
- Enter the Exam Title. In the description section, list your planned path in Canvas (e.g. Canvas > Quizzes > Exam 1). List any additional notes that Exam Commons staff may need for testing.
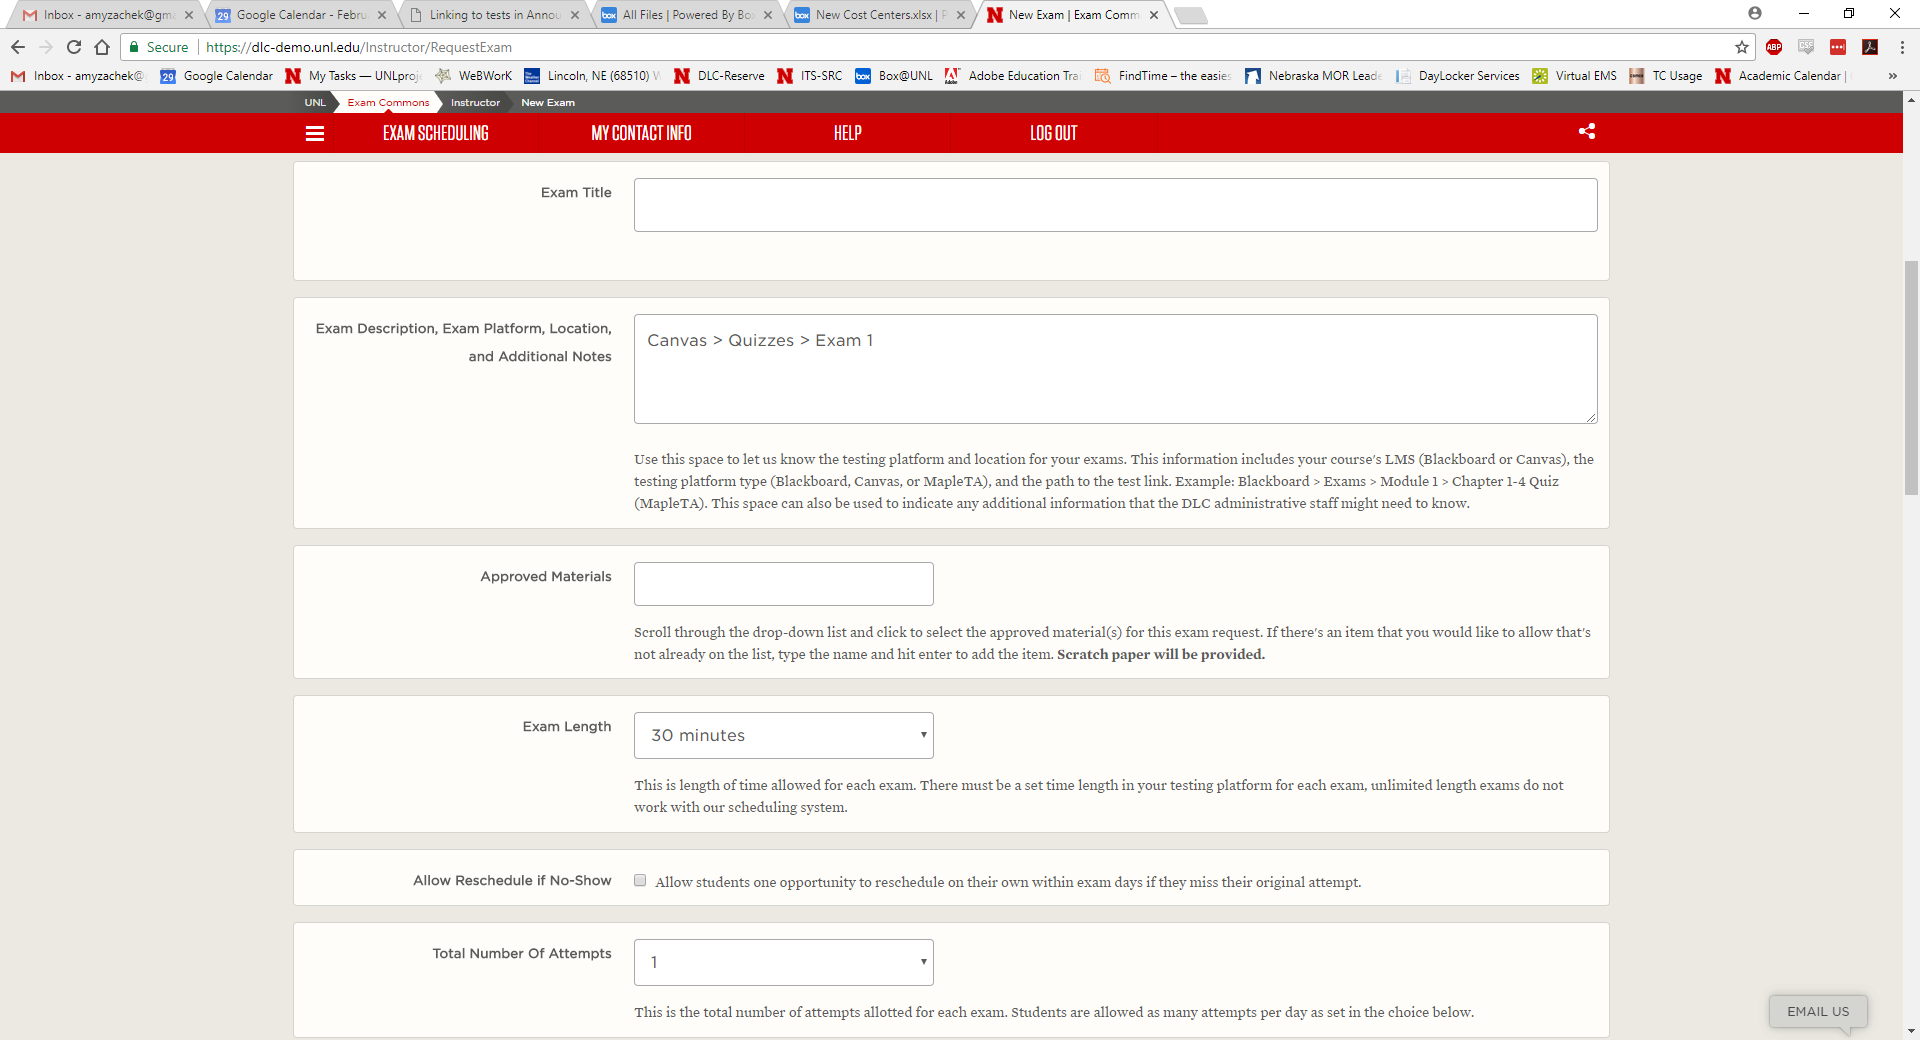
- In the Approved Materials section, click the field to select pre-entered materials. You can also type in an item not on the list and hit enter to add the item.
- Scratch paper is always provided to students (students may not bring in their own). If you do not want any other items to be allowed, you can just leave this area blank.
- Common Question: May I allow my students to bring in a note sheet or note card for testing?
- Yes! You can include a set amount of hand-written note sheets or note cards as an approved item for their students to bring. Requests for open book/open note exams will not be approved since all note sheets must be collected and destroyed when students check-out.
- Note: If you are planning on linking PDF documents within your quiz as an approved material, make sure to list that here. Details on how to do this in Canvas will be provided in the Canvas section of this user guide.
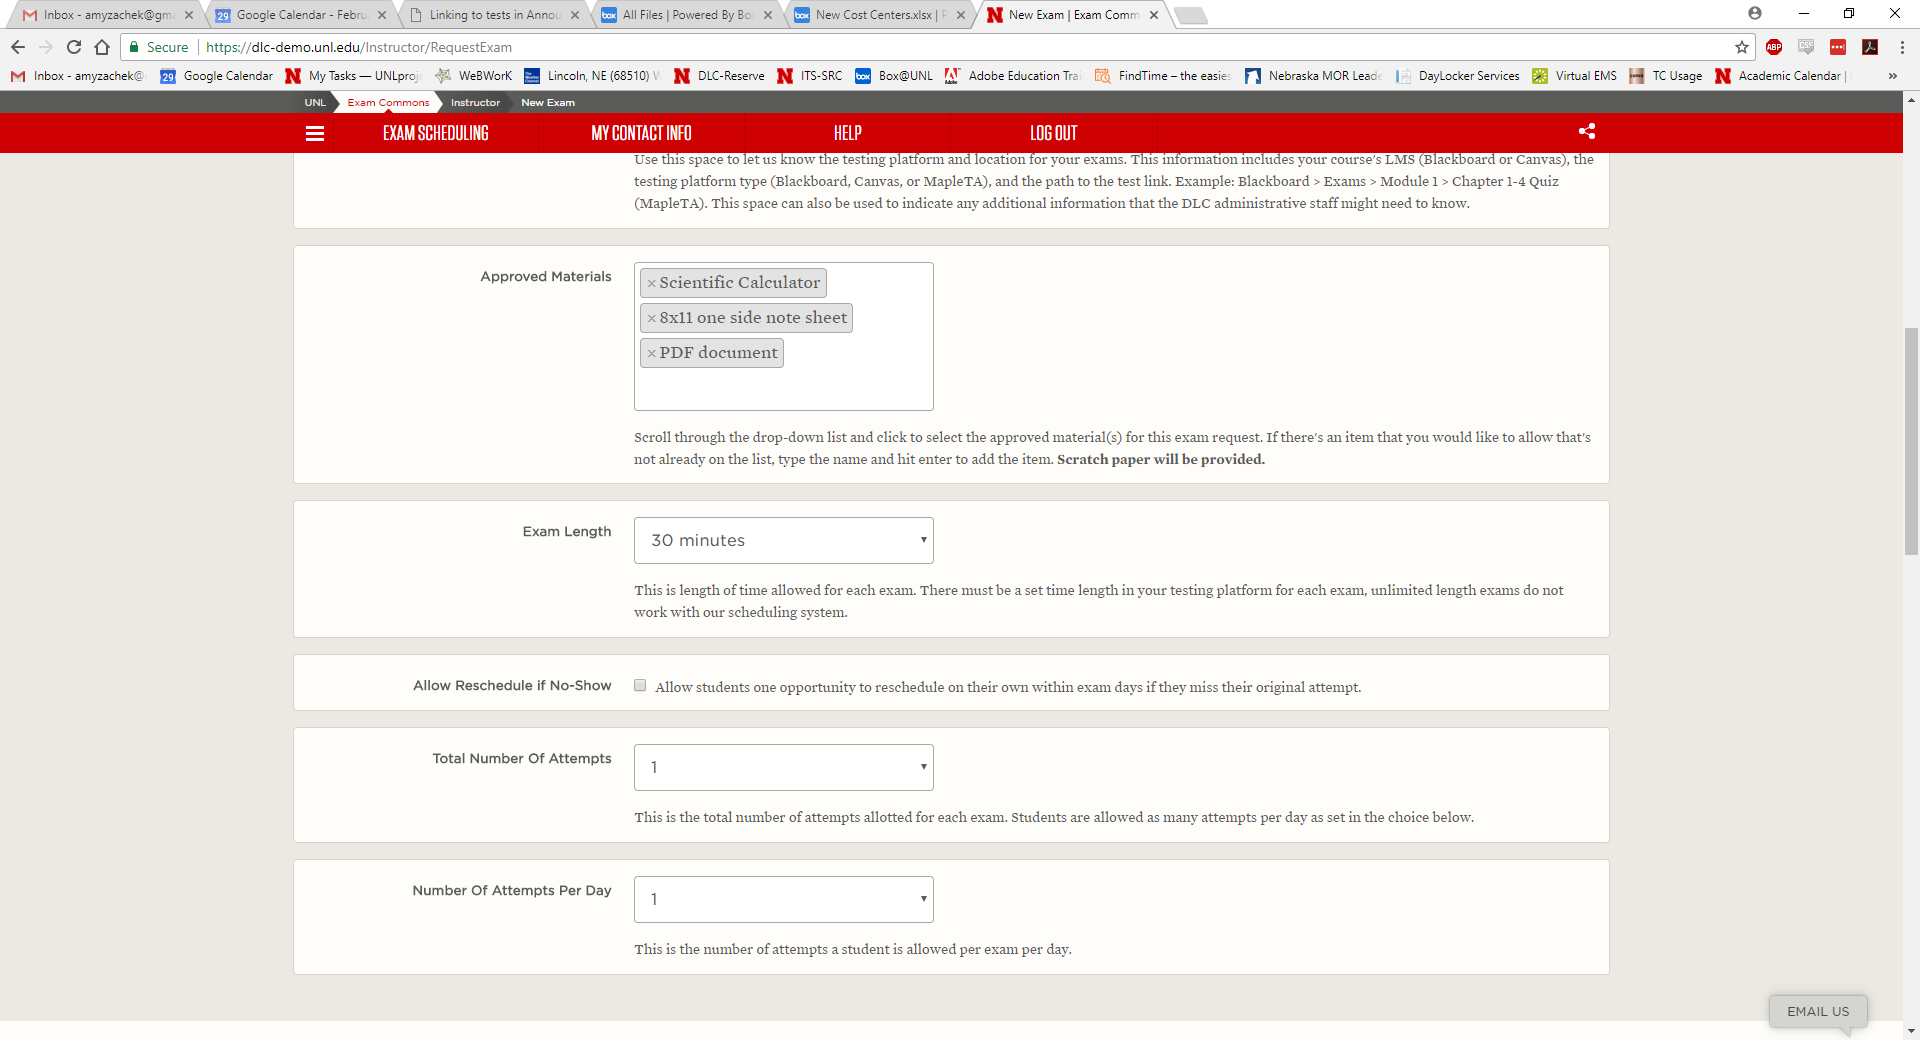
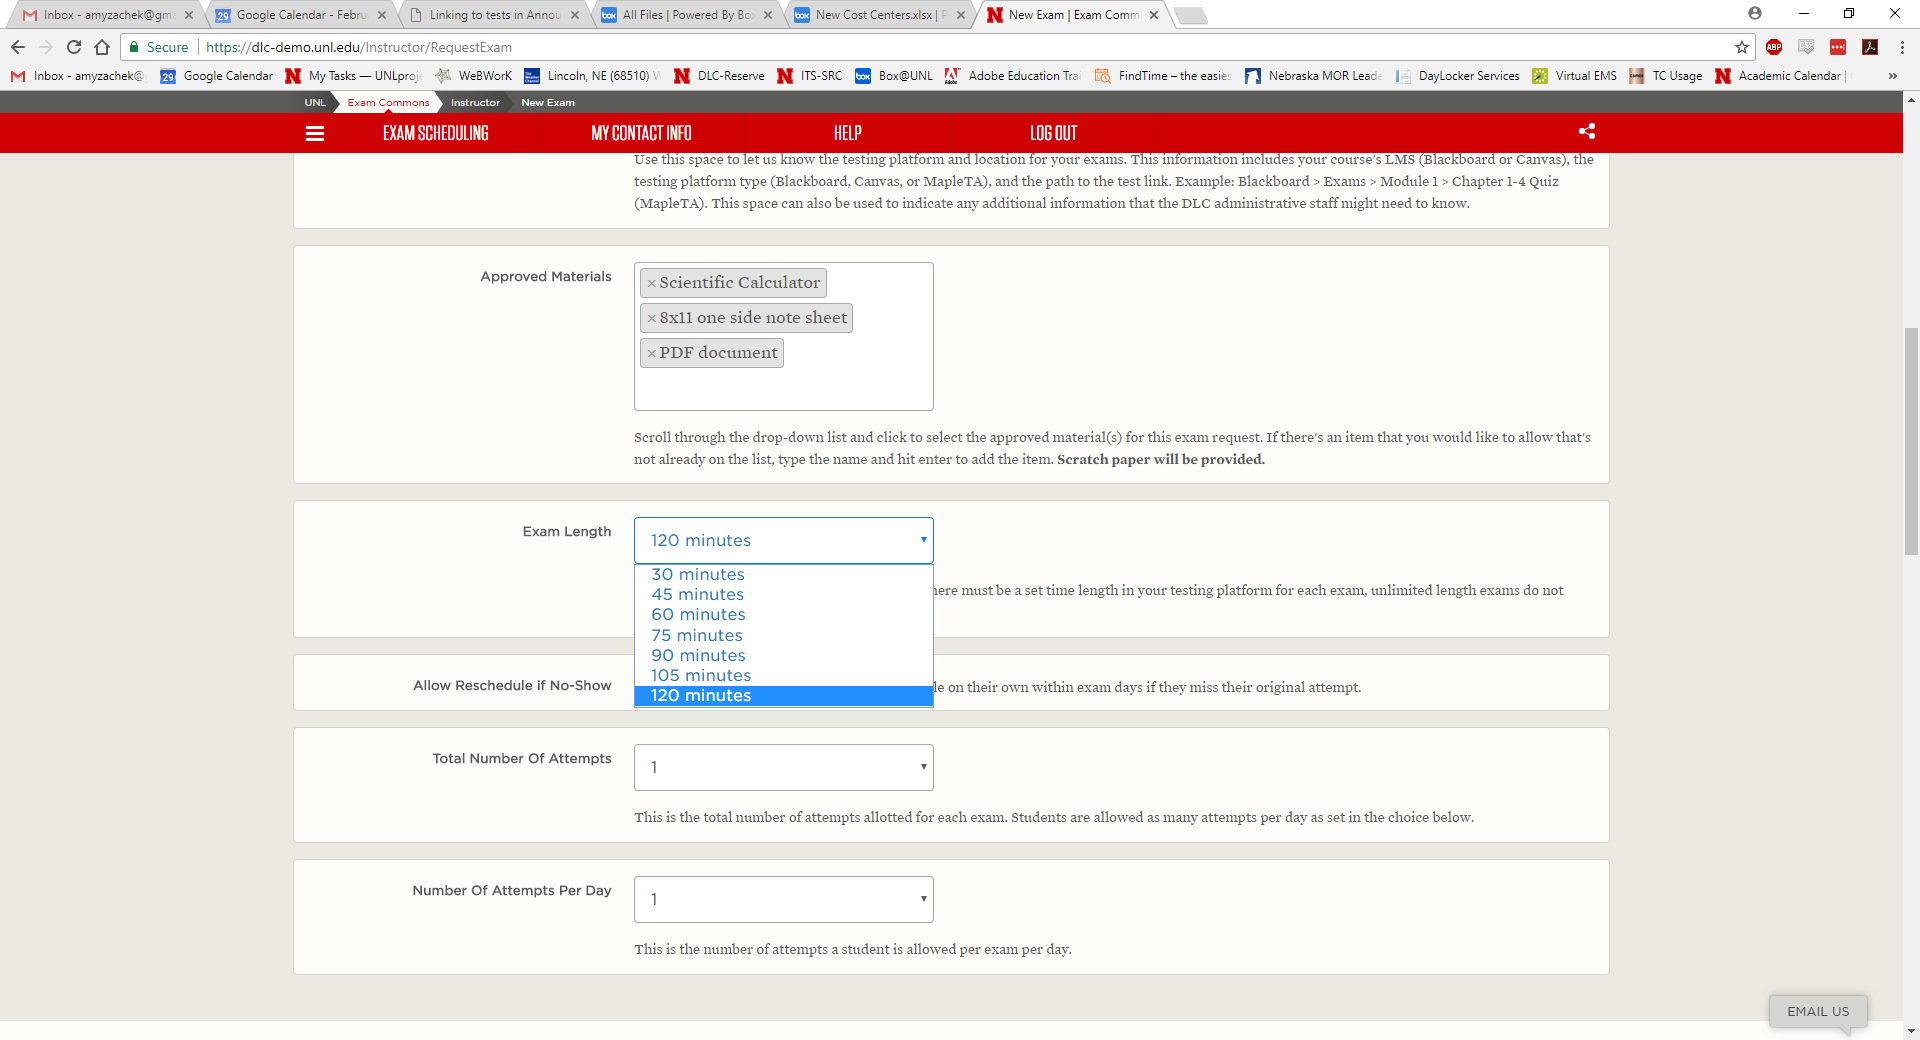
- Select any Exam Length up to 120 minutes. To maximize the efficiency of the Exam Commons and help eliminate empty seats, please try to choose an exam length that’s reflective of the actual amount of time your students will need to test. Average exam length can be determined in Canvas after students start taking your quiz, and more details will be provided about where to find this in the Canvas Item Analysis section of this guide.
- Allow Reschedule if No-Show allows your students one opportunity to sign up on their own for an additional testing time slot if they missed/no-showed for their first time. Students can always edit their time slots and change them if they know they will have an impending conflict, but as soon as they no-show for an exam it is marked as missed in our system, and they are unable to reschedule unless this is selected or the instructor submits a makeup request for them. If you would rather submit makeup exams for students who miss, the “Schedule a Makeup Exam” section is below. Please note that even if your exam has multiple attempts, students will only be able to reschedule one missed attempt on their own (i.e. this is a maximum of one reschedule per test).

- Select the total number of attempts. In the summer when there is less usage in the Exam Commons, instructors also have the option to change the number of attempts per day to two.
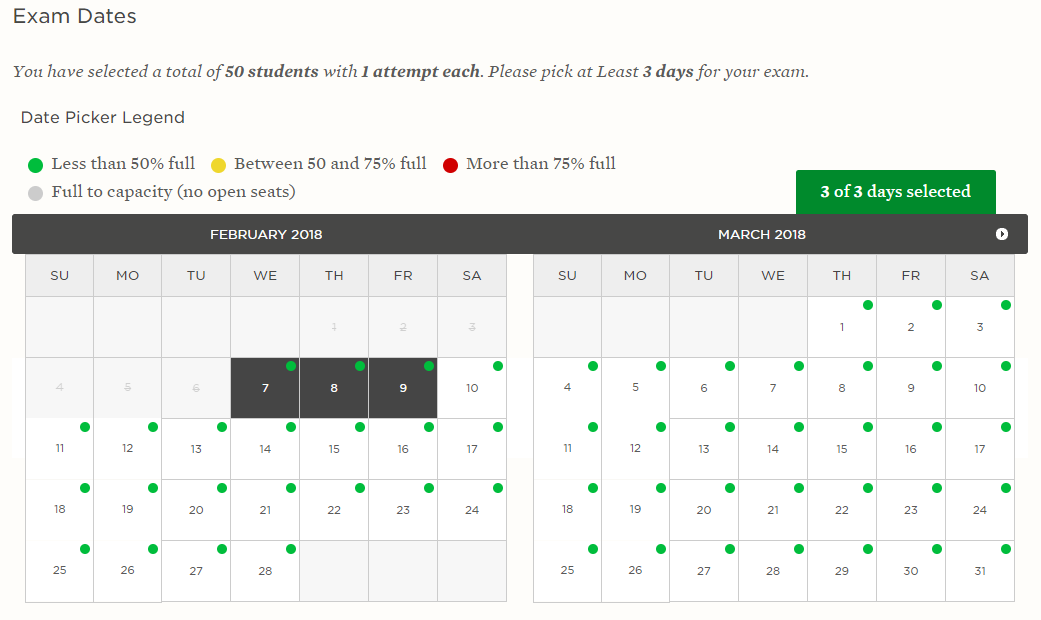
- In the Exam Dates section, you’ll be given a minimum number of days to accommodate all students. Click the dates to have the exam available to students. The dates will toggle on/off with each click. Requests for testing on one day only or one block of time cannot be accommodated.
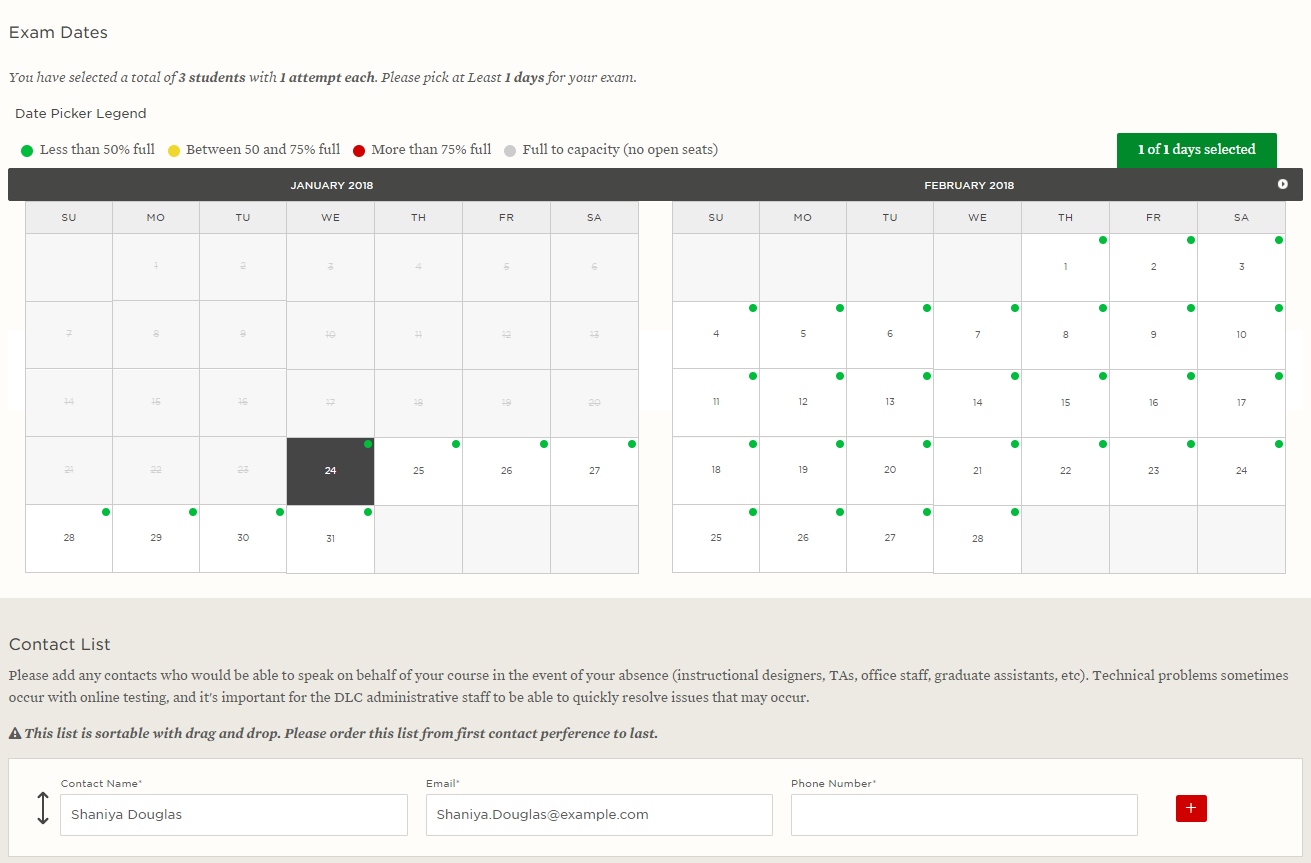
- In the Contact List section, provide at least one person who can speak on your behalf regarding this exam should you be unavailable in the order to be contacted.
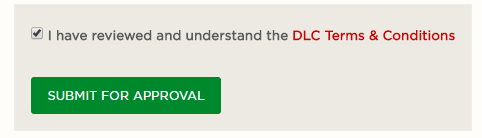
- After you have read the DLC Terms & Conditions, select the checkbox, and then SUBMIT FOR APPROVAL.
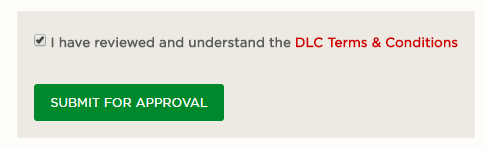
- Your request is now submitted.
Note: When submitted your requests for class-wide testing, you will only be able to reserve times that are two weeks out from the current date.
Schedule a Makeup Exam
Scheduling an exam is the first part of the exam process, and it’s important that you reserve your dates in our system when enough availability remains. Here are some possible situations that may come up that may necessitate a makeup exam: if a student needs to take an exam outside of the regular exam window, if a student has already taken the exam but needs another attempt due to technical reasons, if a student missed their time slot and need another opportunity to sign up, etc. To schedule a makeup exam:
- Log into DLC-Reserve (https://dlc-reserve.unl.edu)
- Click “SCHEDULE MAKEUP EXAM” to begin creating your testing reservation:
- Multiple students may be included in a single makeup request.
- Enter all other exam details in the areas provided. For makeup exam requests, it is not necessary to select more than one date. There is also no lead time for these requests – you may submit for as soon as the current day.
- After you have read the DLC Terms & Conditions, select the checkbox, and then SUBMIT FOR APPROVAL.
- Your request is now submitted.
Manage Existing Requests
Edit a Request
To edit a request that you have submitted, log into your instructor dashboard at http://dlc-reserve.unl.edu. Then, click the “Edit” link and make the necessary changes before you click SUBMIT FOR APPROVAL. Note: Requests can only be edited if they have not yet been approved by the Exam Commons administrator. Once they have been approved, the “Edit” link will disappear. If you must make last minute changes to your request, please contact the Exam Commons manager.
Cancel a Request or Approved Exam
To cancel a request, log in to your instructor dashboard at http://dlc-reserve.unl.edu. Click the “Cancel” link and then click the CANCEL THIS EXAM button. Note: Requests can only be cancelled if they are not yet open for student registration. Once they are open to students, the “Cancel” link will disappear. If you must make a last minute cancellation to an open exam, please contact the Exam Commons manager.
Clone a Request or Approved Exam
To clone a request, log in to your instructor dashboard at http://dlc-reserve.unl.edu. Click the “Clone” link to create a copy of a request, make the necessary changes for the new request, and click SUBMIT FOR APPROVAL. Exams can be cloned before or after they have been approved.
Manage Access
Like with submitting exam requests, you are able to add access for other people to courses 45 days before the start of the semester. Once added, these authorized people (e.g., a teaching assistant, instructional designer, etc.) are able to do the following:
- ADD others to the course, and remove others except for the original course owner.
- EDIT the details of an exam, if they have access to all courses that an exam is scheduled for.
- CLONE an exam, to schedule another with similar details except for the dates.
- CANCEL an exam, if they have access to all courses that an exam is scheduled for.
To add people to a course, follow these steps:
- Go to your instructor dashboard on http://dlc-reserve.unl.edu
- Click the MANAGE ACCESS button.

- In the “Grant New Access to a Course” section, enter the person’s MyUNL username OR NUID.
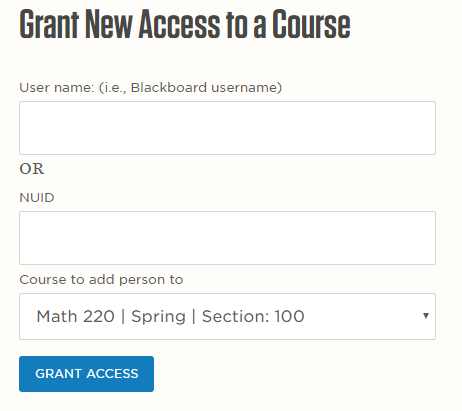
- Select the course from the drop-down list for which they need access.
- Click the GRANT ACCESS button.
- Click OK when finished. You’ll see the person added to the Members with Access area.
Student Registrations
Students are able to start signing up for testing timeslots two weeks before the first day of your exam request. DLC-Reserve will send out an automatic notification email at that time to let you students know that they have a new exam to register for. If they don’t sign up for a timeslot, DLC-Reserve will continue sending reminder emails until the start of the testing period. These additional reminder emails will go out one week prior to testing, three days prior to testing, and one day prior to testing.
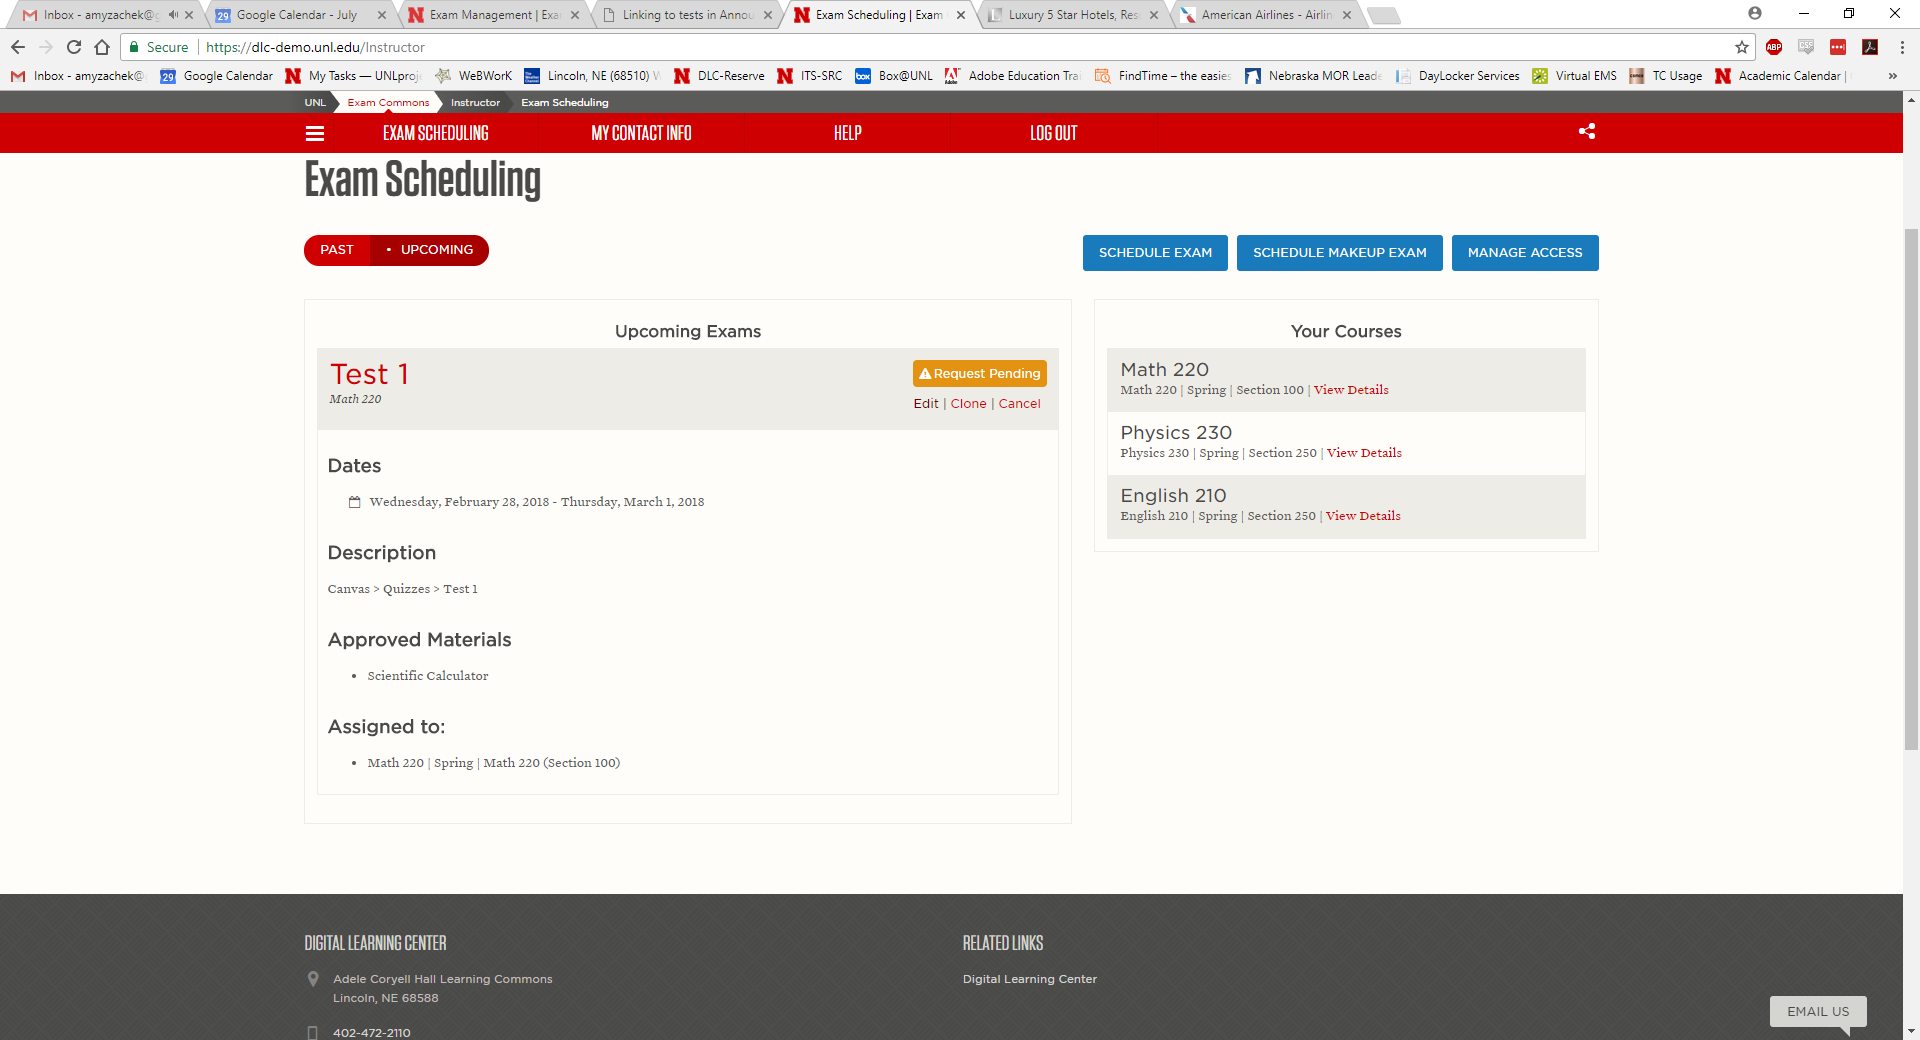
As soon as your students are able to start registering for their timeslots, you will be able to see the list of student registrations on your instructor dashboard. To see this list:
- Go to your instructor dashboard on http://dlc-reserve.unl.edu
- Click the name of the exam request that you wish to view registrations for.
- This will take you to a page that will show all of the students who have registered for your exam.
How to Schedule a Request for a Student Not Currently in a Course
If a student needs to take online exams in the Exam Commons but they are making up exams from a previous semester, there is a way to accommodate this need in our system. The Exam Commons administrator has the ability to internally add students to a roster for one of your current courses in our system (this does not affect their actual Canvas or Registrar course enrollments). Then, once the student is added the instructor is able to create makeup requests for that student (and they will also be automatically included in the roster for class-wide exam requests). Here’s an example of the steps to follow to request this:
- Email the student’s My.UNL username or NUID to its-unl-examcommons@nebraska.edu or to the Exam Commons manager and state that the student needs to test for a past course. In this email, also say if you have a preference for which current course the student should be added to.
- The Exam Commons manager will add the student to one of your current courses and then confirm with you when this is done.
- When this is done, the student will be in the DLC-Reserve course roster for the remainder of the semester. You will be able to create makeup exams and class-wide exams that include the student like any other.
Creating a Canvas Quiz
Canvas Quizzes are an intuitive and user-friendly choice for online testing. Here’s how to get started and create your quiz:
- Go to your Canvas course.
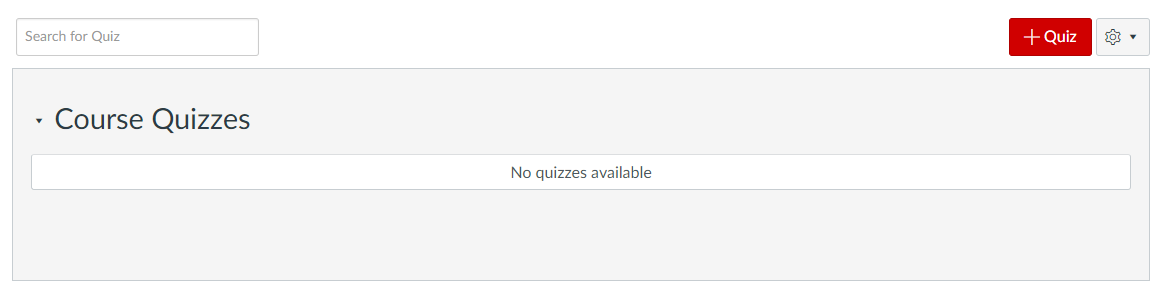
- Click “Quizzes” on the left side. This link will be grayed out if there is nothing published here.
- Click the red “+ Quiz” button in the upper right.
- Change the quiz title and click “Save” at the bottom to set up the framework of your quiz.
Note: You may work on creating your quizzes after you submit your exams, and you may continue to adjust your quizzes up until the start of testing. The main thing is that your quiz must be ready and published by the first day of testing.
Create a Question
When you’re ready to create a question, click back on the title of your quiz. To start:
- Click “Edit” in the upper right.

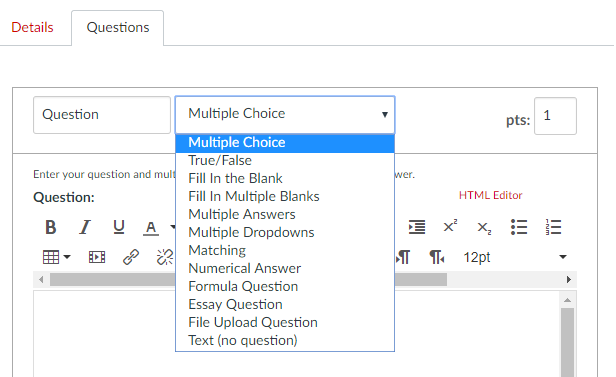
- Click the “Questions” tab to the right of “Details.”
- Click “+ New Question”

- Select the question type you wish to create from the drop-down question type menu.
- Type or copy and paste your question into the question field. You can also embed an image into the question that’s in your Canvas account, on Flickr, or on the internet. To do this, click “Embed Image” to bring up an image source page.

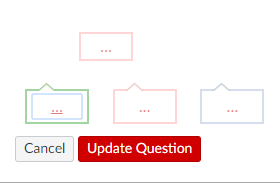
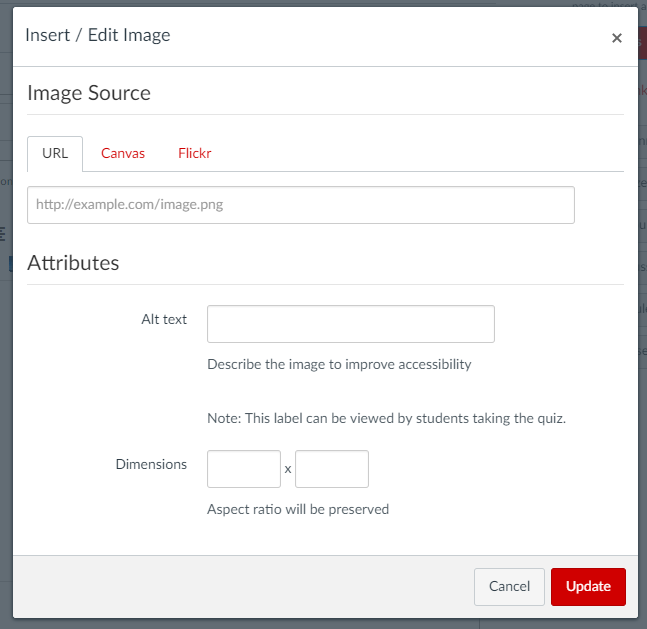 Click the red “Update” button when you’re done.
 - Enter the correct answer in the “Correct Answer” field, and then enter other possible answers below. If you have created a multiple choice question, you may remove or add additional answers as needed. If you wish, you may also set images as correct answers instead of text (follow the same embed image instructions listed in step 5).
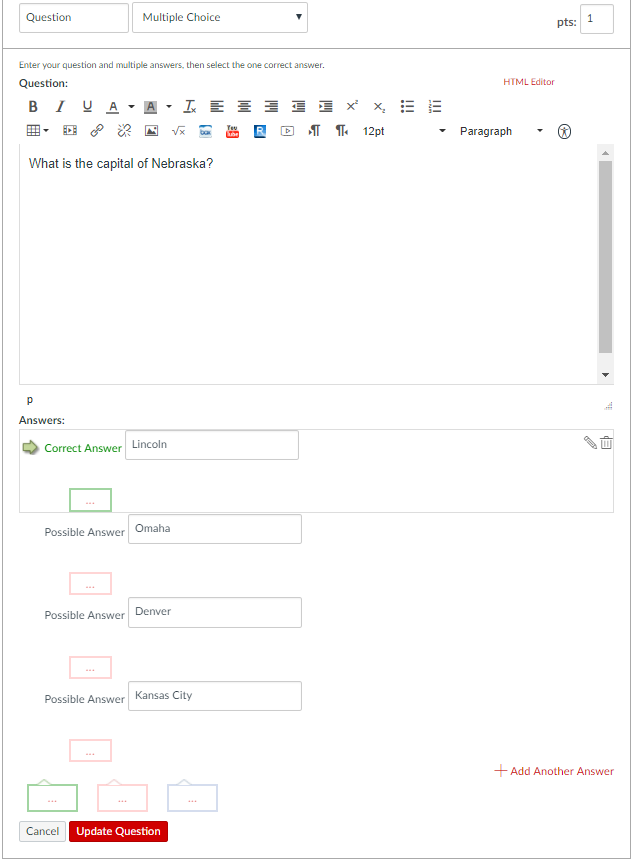
- When you’re done creating your question, click “Update Question” to save your work.
- Click the red “Save” button at the bottom when you’re done adding questions.
Note: You can change the answer positions by mousing over a possible answer, hovering over the green arrow, and clicking it. You can select “Shuffle Answers” in the quiz settings (this will be described below in the “Quiz Setting” sections). Use one of these methods to shuffle your answers, otherwise all of your correct answers will be the same answer position as shown.
Linking Digital Materials into Questions
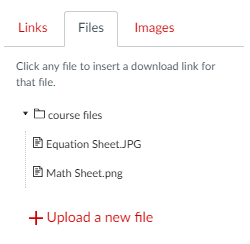
If you would like, you can link digital materials such as PDFs into your quiz instructions and/or specific questions for your students. Examples of these materials include formula sheets, readings, etc. (make sure that you also included these in the “Approved Materials” section of your exam request as well, or if you didn’t contact the Exam Commons to have them added). You can link to documents by following these steps:
- Go to the Files link on the left side of your Canvas course.
- If the file you wish to link isn’t already uploaded into your course, click the red “Upload” button and select the file to upload.
- The file is now in your course files, and can be easily linked to. Go back to Quizzes and click your quiz title.
- Click “Edit” and then Questions at the top.
- Go to the question where you would like to insert the document and click the pencil in its upper right hand corner to edit.
- Select the words in your sentence that you would like to hyperlink to the file, or select the entire quiz question.
- Mouse to your right and click “Files,” and then click on the file that you would like to link to.
- This will turn the hyperlinked text yellow for a couple of seconds, and then when you hover over the text you can see that it’s linked.
- Make sure to hit “Update Question” and then “Save” at the bottom when you’re done.
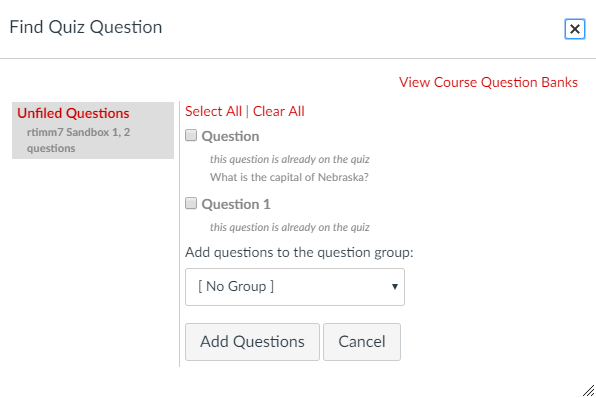
As you create questions, Canvas will automatically put them into a course-wide question bank titled “Unfiled Questions.” I recommend organizing your questions into the proper banks from the start, rather than having to go back and separate questions out when you’re done (this also allows you to easily pull them into randomized question groups in the next step). So, before you begin creating too many questions, plan out how you would like to organize similar content areas into banks. To manage your question banks, do this:
- Go to the “Questions” tab of your quiz and click “Find Questions”

- Click “View Course Question Banks”
- Here you can create a new question bank by clicking “Add Question Bank” on the top right hand corner.

- Click any of the created Question Banks to edit or manage their content or “Unfiled Questions” to manage all questions for the course.
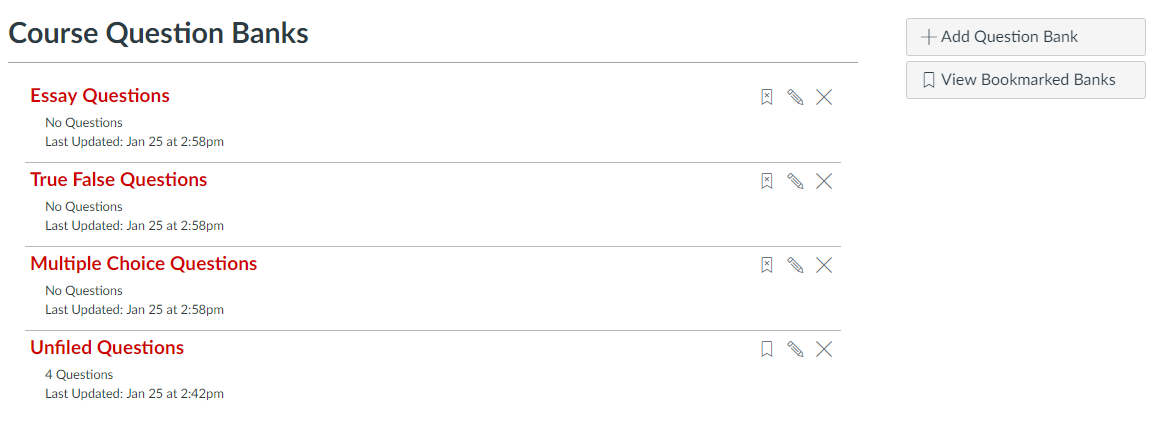
- On the right side, you’ll see several options.
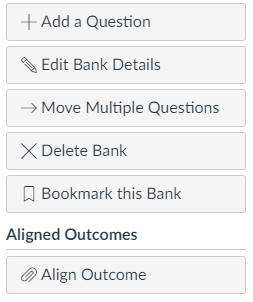
- “Edit Bank Details” will let you rename your bank
- “Add a Question” will let you create questions directly in the bank so that they’re in the right place from the time they’re created
- “Move Multiple Questions” to move them to different banks.
Note: If you make an edit to a question that is already on your quiz it will update on the quiz, but the question will NOT update in the bank. Also, a question that is updated in the unfiled question bank will NOT update on the quiz, unless questions are being pulled from a question group (see below).
Question Groups
Once your question banks are set up, here is how you can set up question groups that select randomized questions for students:
- Go to the “Questions” tab of your quiz and click “New Question Group”

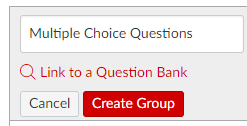
- Type in a group name, such as “Multiple Choice Questions,” and click “Link to a Question Bank”
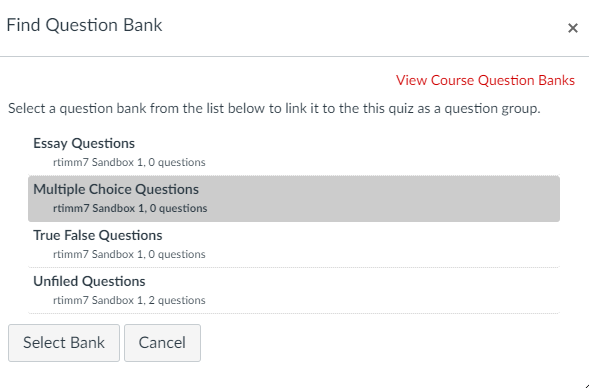
- Click the question bank that you would like questions to be pulled from and click “Select Bank”
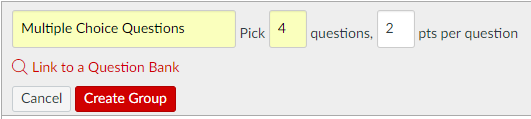
- Fill out the “Pick x questions, x pts per question” section with how many questions you would like to be picked and their point value.

- Click “Create Group”
- Information about the group will display, and you will now be able to access a link to the question bank that is being pulled from for the group in the description.

Preview Your Quiz
It’s easy to preview your quiz in Canvas to make sure you’re on the right track. Here’s how to do it:
- Go back to the Quizzes link on the left side and click on your quiz title
- This will pull up a settings summary page, and will have a red “Preview” button at the bottom.
- Click “Preview.”
Quiz Settings
Canvas defaults to some of the settings that you need for your quiz, but there are others that need to be adjusted. To change your settings, go back to the Quizzes link on the left side and click on your quiz title. Click edit. There are three main settings sections here:
Quiz Instructions
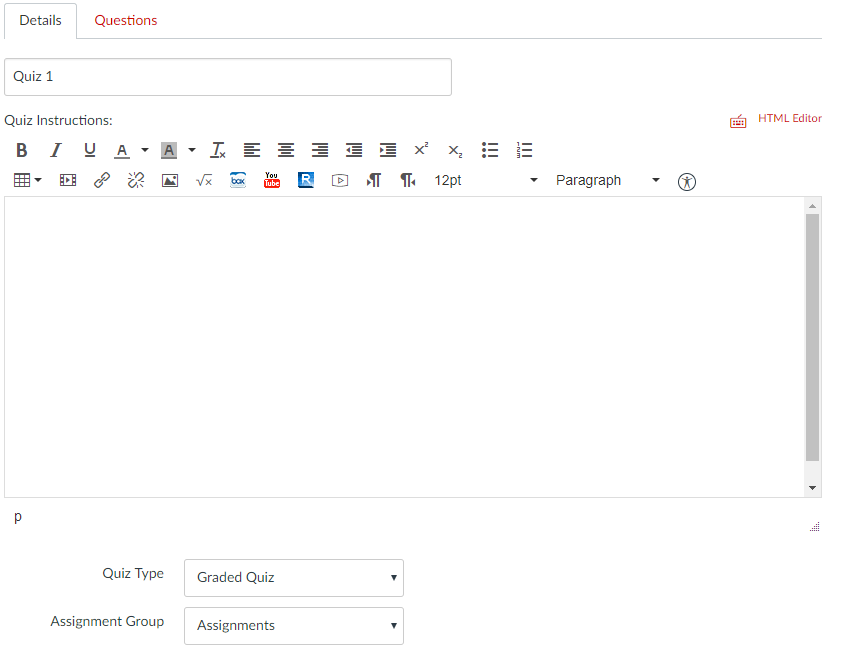
This section has the quiz instructions, quiz type, and assignment group.
- Include in the instructions any information about the quiz that the students will need. This is also a good place to insert links for digital materials that students will need to access during testing (e.g. formula sheets, readings, etc. – make sure to include this in the “Approved Materials” section of your exam request as well). This process is detailed above in the “Linking Digital Materials” section.
- Make sure to leave the quiz on the default for quiz type, “Graded Quiz” so that it is recorded in the gradebook as such.
- You can also leave the default setting for “Assignment Group”
Quiz Options
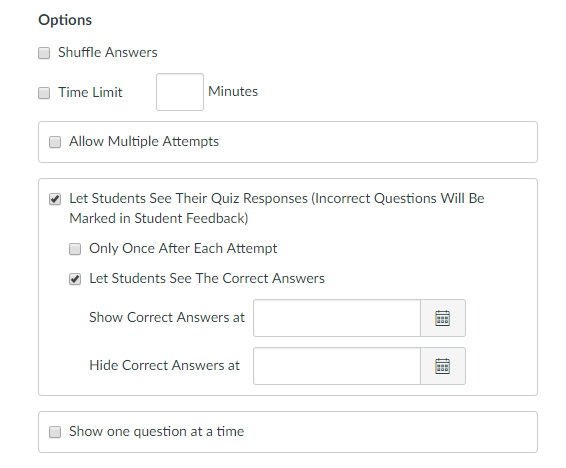
There are a few important settings in this section. Here’s a walk-through of what each setting does:
- Shuffle Answers – This option shuffles all possible answers in displayed questions. It does not randomize the questions themselves, though; randomization must be set up manually through question groups and banks.
- Time Limit – The maximum amount of time for exams in the Exam Commons is 120 minutes. Make sure that the amount of time you enter here matches the amount of time on your exam request.
- Allow Multiple Attempts – This setting pulls up a larger menu when you click it, including selections for which quiz score to keep and for how many attempts are allowed. Make sure that your number of attempts also matches the number of attempts you listed on DLC-Reserve. The number of attempts on the DLC-Reserve site dictates the number of attempts students can sign-up for.
- Note: Canvas does not currently have a way to only allow one attempt per day, so occasionally students with multiple attempt quizzes will accidentally start their next attempt after completing one.
- If this happens, the Exam Commons will provide the student with an additional attempt and notify the instructor.
- Instructors can also add extra attempts for students, and that tutorial will be provided later in this guide.
- Note: Canvas does not currently have a way to only allow one attempt per day, so occasionally students with multiple attempt quizzes will accidentally start their next attempt after completing one.
- Let Students See Their Quiz Responses – This is automatically selected, as well as “Let Students See The Correct Answers.” If you leave this setting as is, students will be able to see which questions they got right and wrong, and the correct answers (and even at home!). Most instructors do not want to reveal this much exam information, so there are a couple of ways to tighten the restrictions here.
- Selecting “Only Once After Each Attempt” allows students to only see their responses once (and also the correct answers, if you have that selected too). Canvas forces students to view these responses at the end of testing, so they would be required to “use their view” in the Exam Commons. This is the most secure way to allow students to view their results.
- You can also set correct answers to be shown later in the semester after everyone has completed the exam. However, if you have this set, be aware that students would be able to access the results from home during this time frame (future results viewing cannot be set in combination with “Only Once After Each Attempt”).
- Show one question at a time – This is completely up to the preference of you and your students. I often will see this setting deselected, as it seems that many students like to be able to scroll up and down through all questions during testing and instructors understand this.
Quiz Restrictions
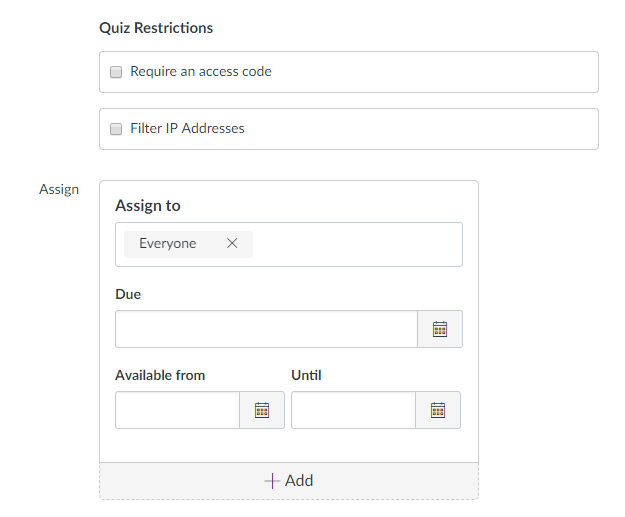
This last section is where you set how and when your students can access your quiz.
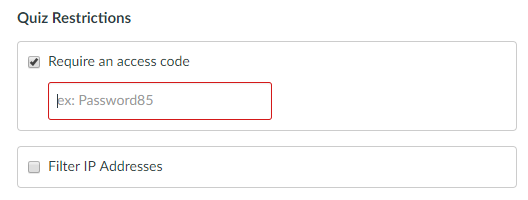
- Require an access code – This is where you would set a password for a proctor. Passwords are not used for security in the Exam Commons, so you can leave this field blank for Exam Commons only testing. If some students are testing locally and some are distance students testing with a proctor, you will want to create a copy of this exam and change this setting. Details will be given about this in the “Copy a Quiz” section below.
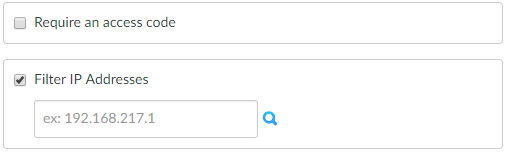
- Filter IP Addresses – The Exam Commons uses IP filtering for security. “UNL Testing Centers” is the name of the IP group, and this includes IPs in the DLC Exam Commons as well as the SSD Testing Center. It’s extremely important that you make this selection before publishing your quiz, so that your students cannot access it from home. Here’s how to set up IP filters:
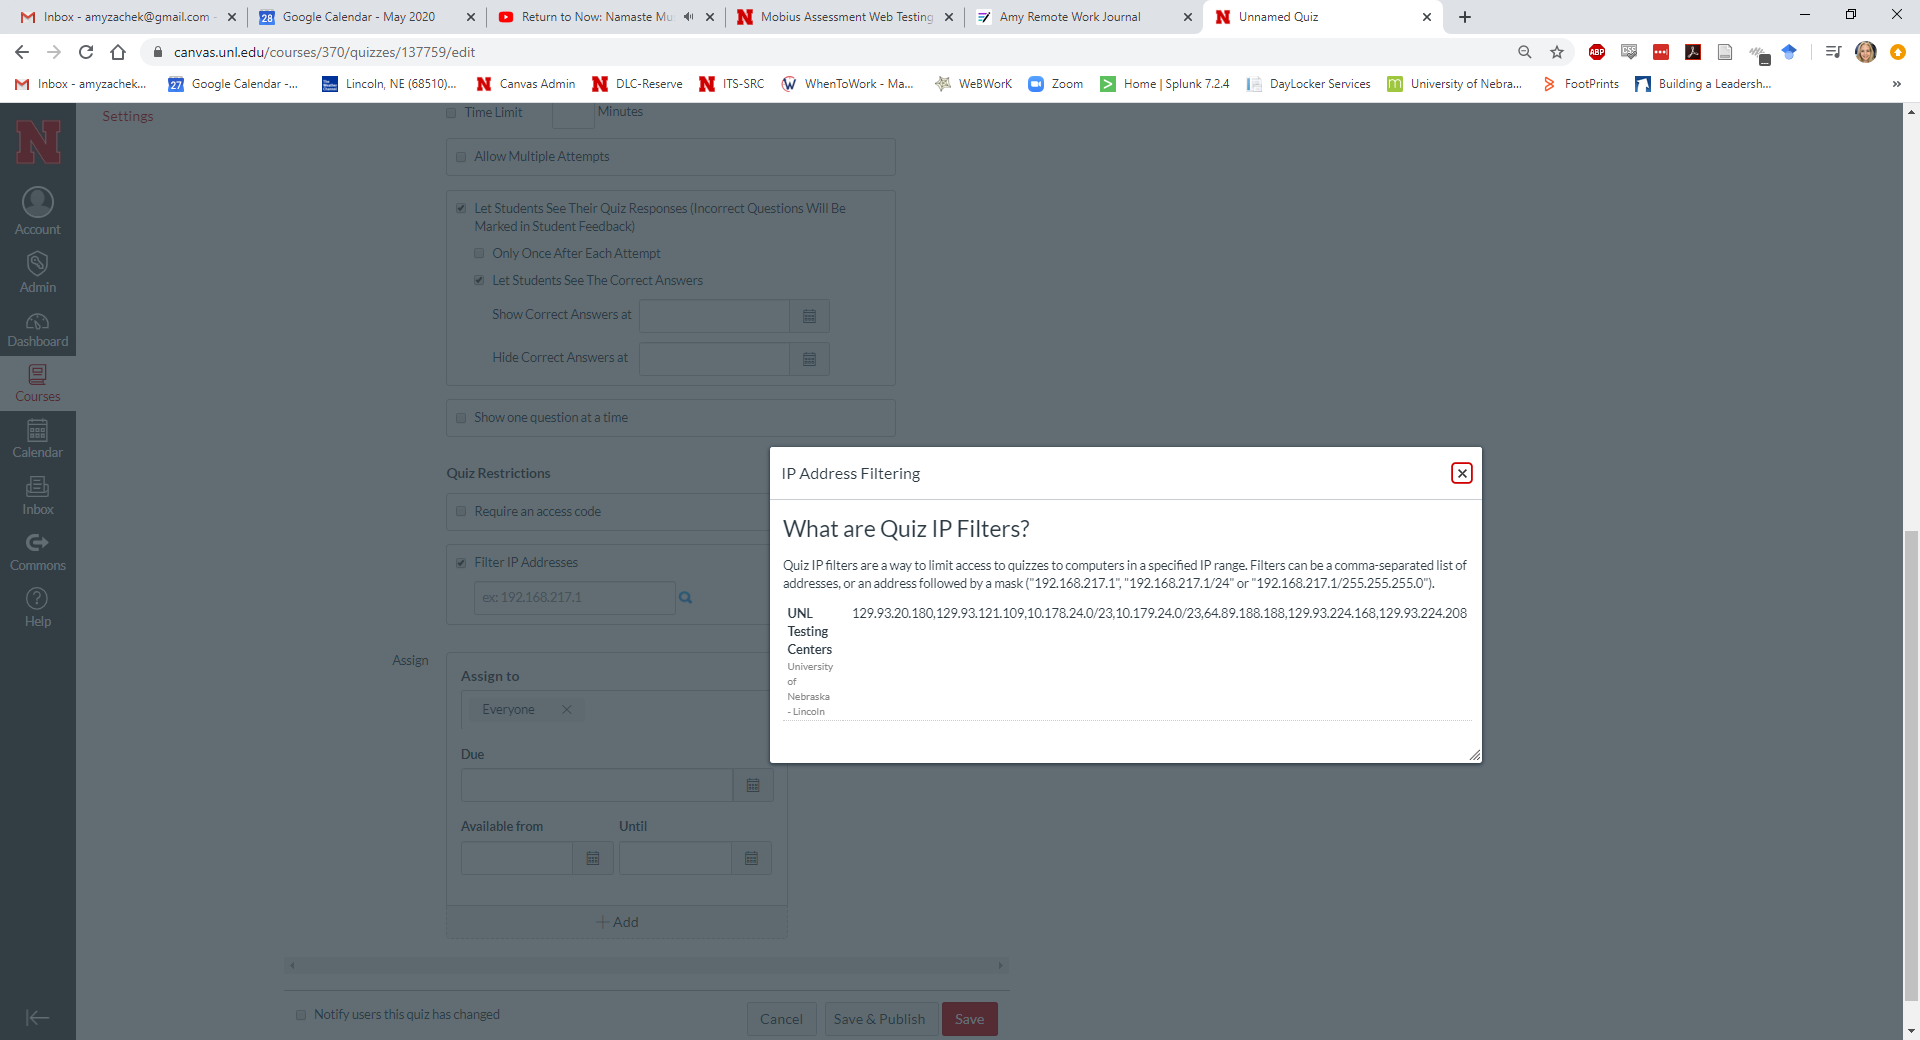
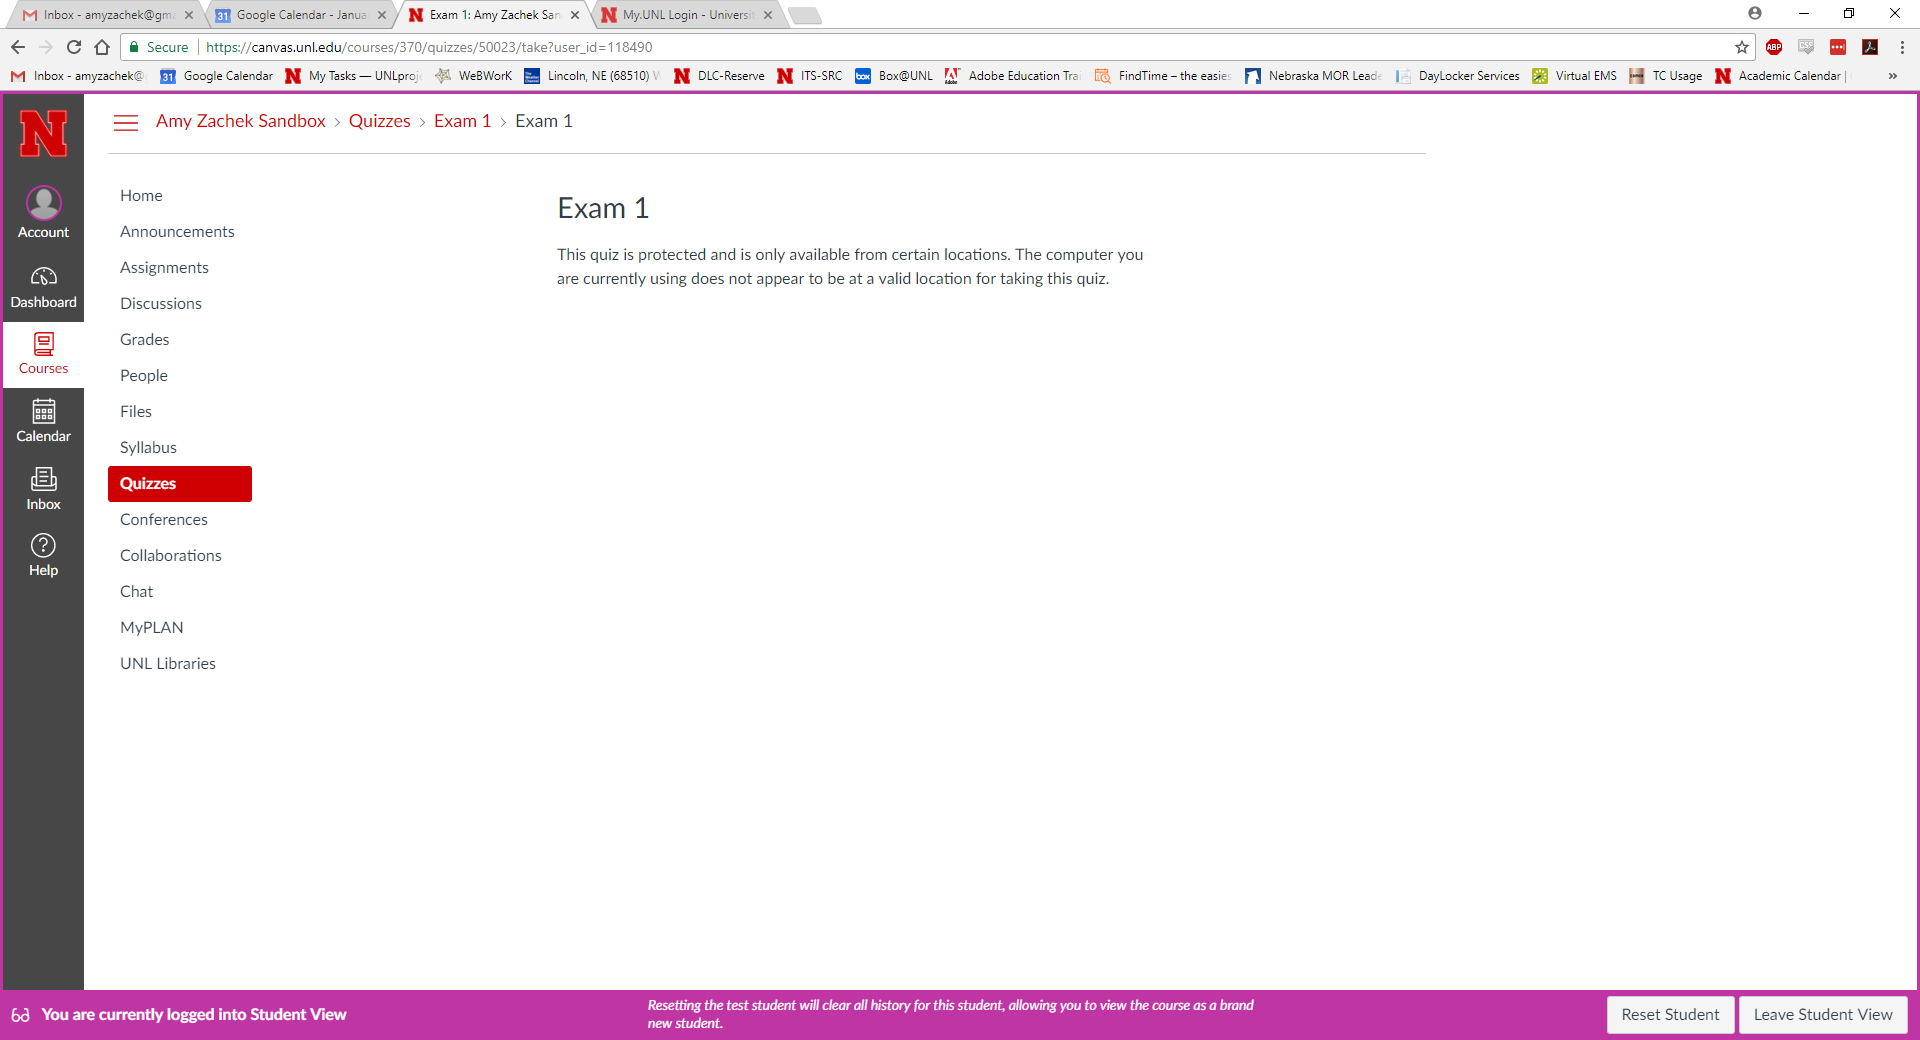
If IP filters are set and a student tries to access a quiz from home, they will receive an error message saying that they cannot access the quiz from their current location. Example:
- Assign – This section lets you assign the quiz to all or certain students. It’s also important to set the Due, Available from, and Until dates and times so that this quiz appears on your students’ Canvas calendars. Quizzes should span only entire days of testing (not partial days), and you can access the Exam Commons’ hours of operation here so you know which times your quizzes should start and end:
Hiding Quiz Scores from Students
In the above section, we discussed hiding quiz responses and correct answers from students. To hide grades, follow these steps
- Click on the quiz that you would like hide grades for
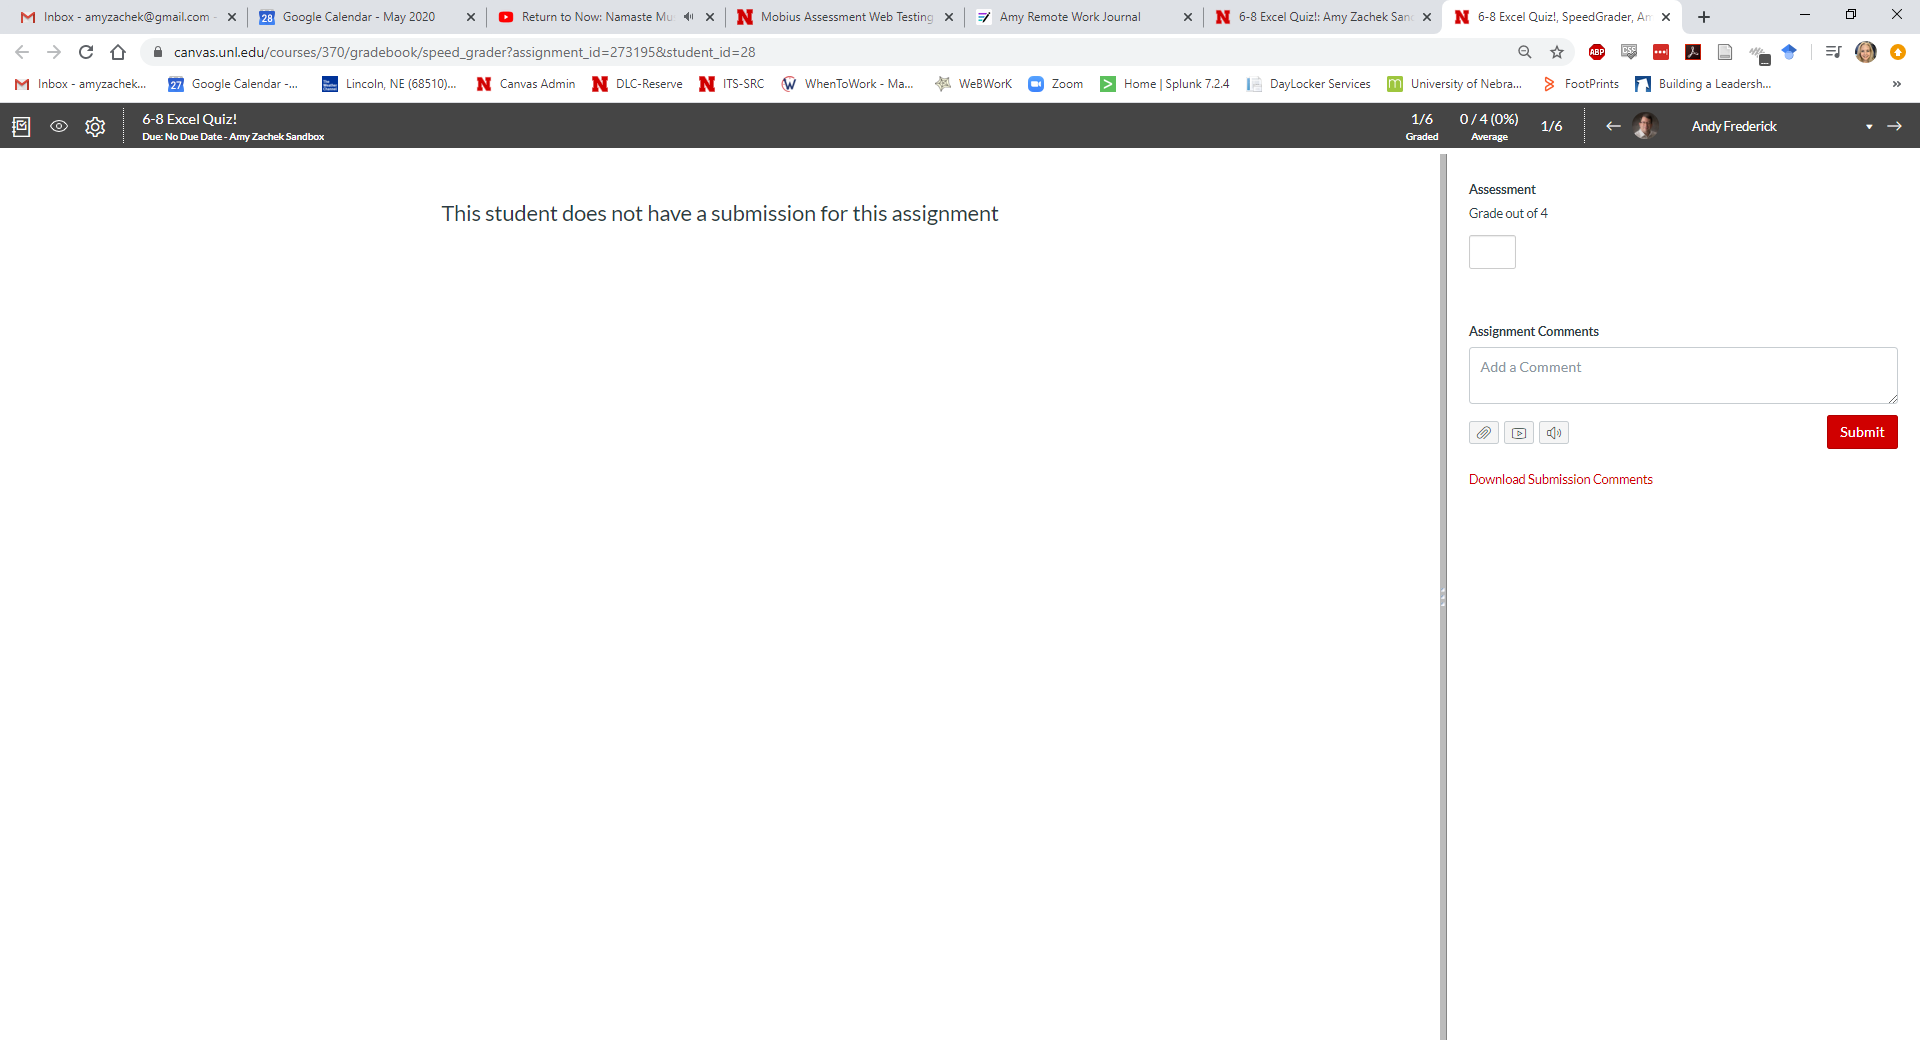
- Click SpeedGrader™ in the right menu
- Hover over the eye icon on the left top bar. This button allows you to post or hide grades.
- Clicking hide grades will display this dialogue:
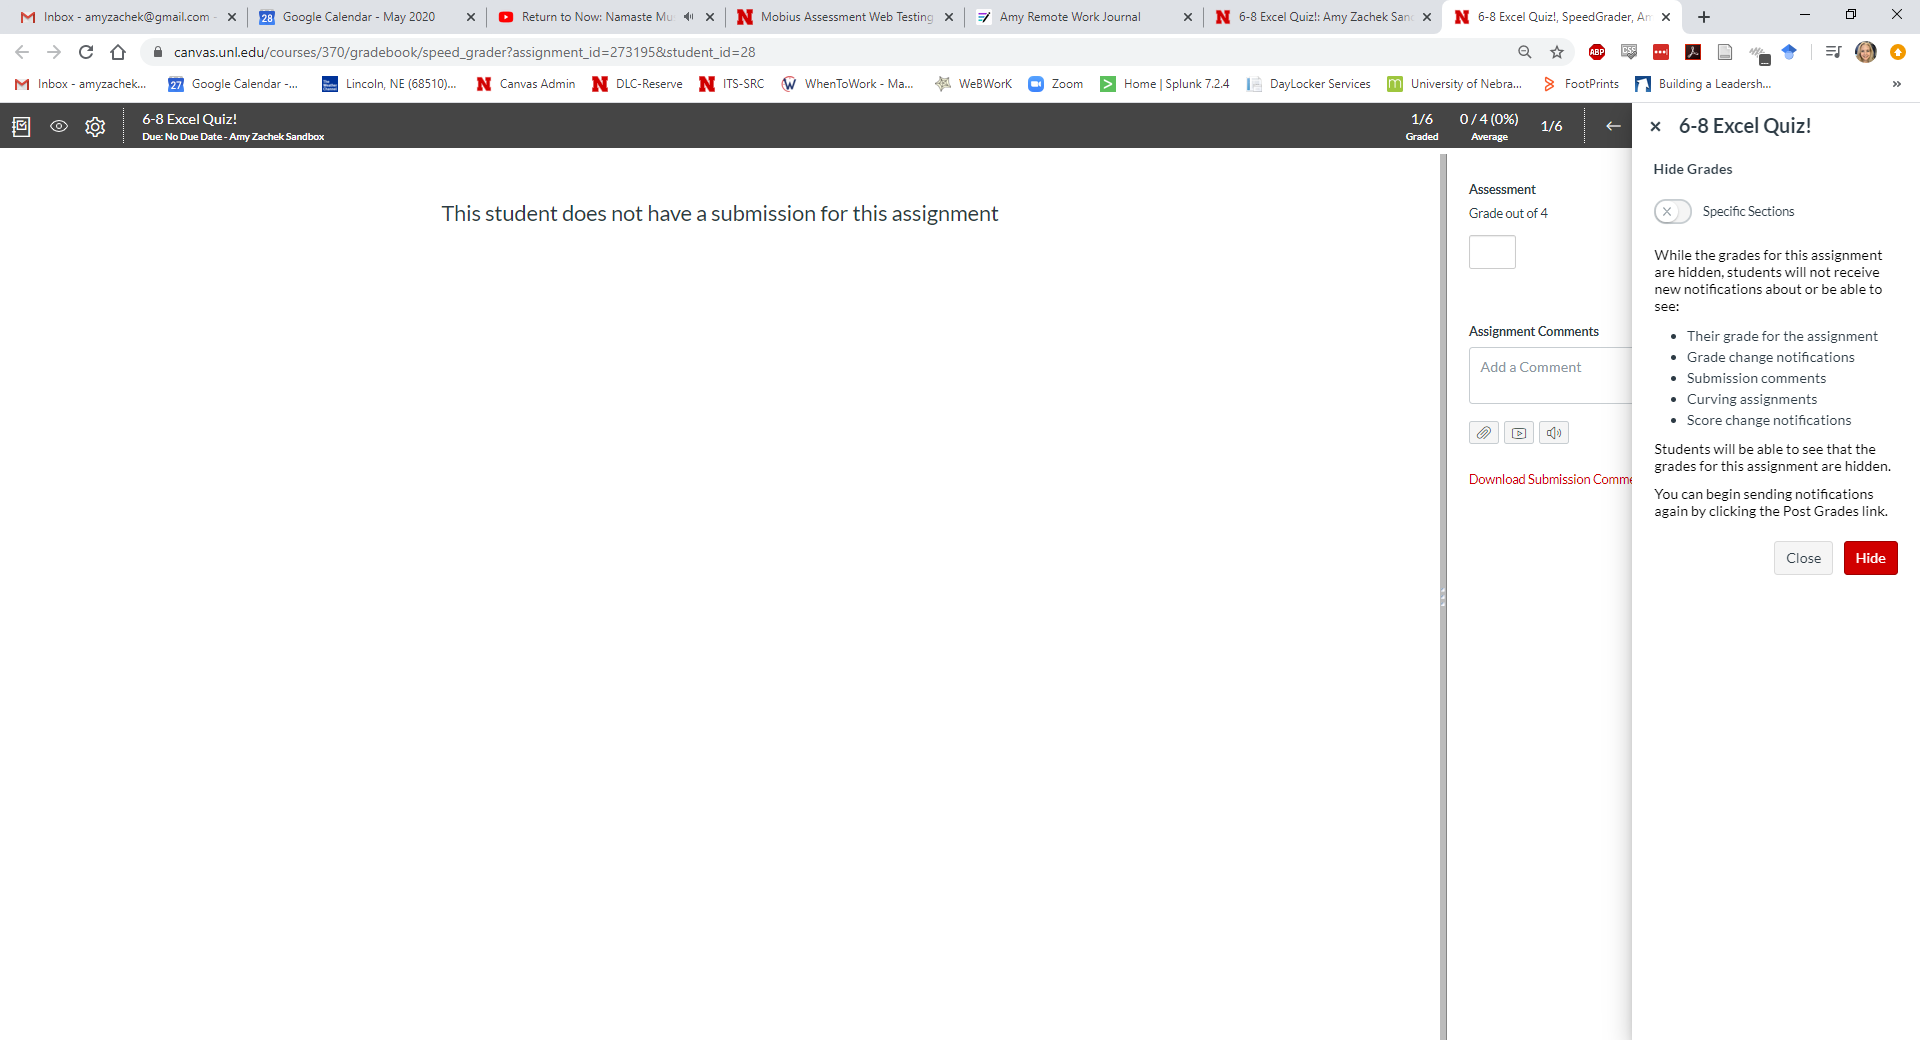
- Click “Hide”
If you go to the “Grades” section of your Canvas course, you will now see a crossed out eye in the assignment’s column. You may post grades at any time.
Note: You will only be able to use the SpeedGrader™ to hide grades for a quiz after it has been published.
Publish a Quiz
Before you publish a quiz, make sure that you have set IP restrictions. This is a very important step, since students could access quizzes at home if a quiz was published without IP restrictions set. When you’re ready to publish, all you have to do is hover over the crossed circle on the right side of the quiz in Quizzes, and click publish.
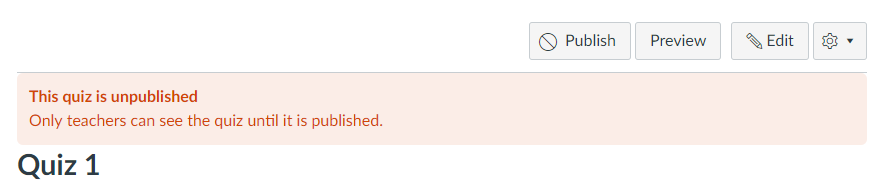
This will turn to a green circle with a check, and students will be able to see the link as soon as you hit publish.

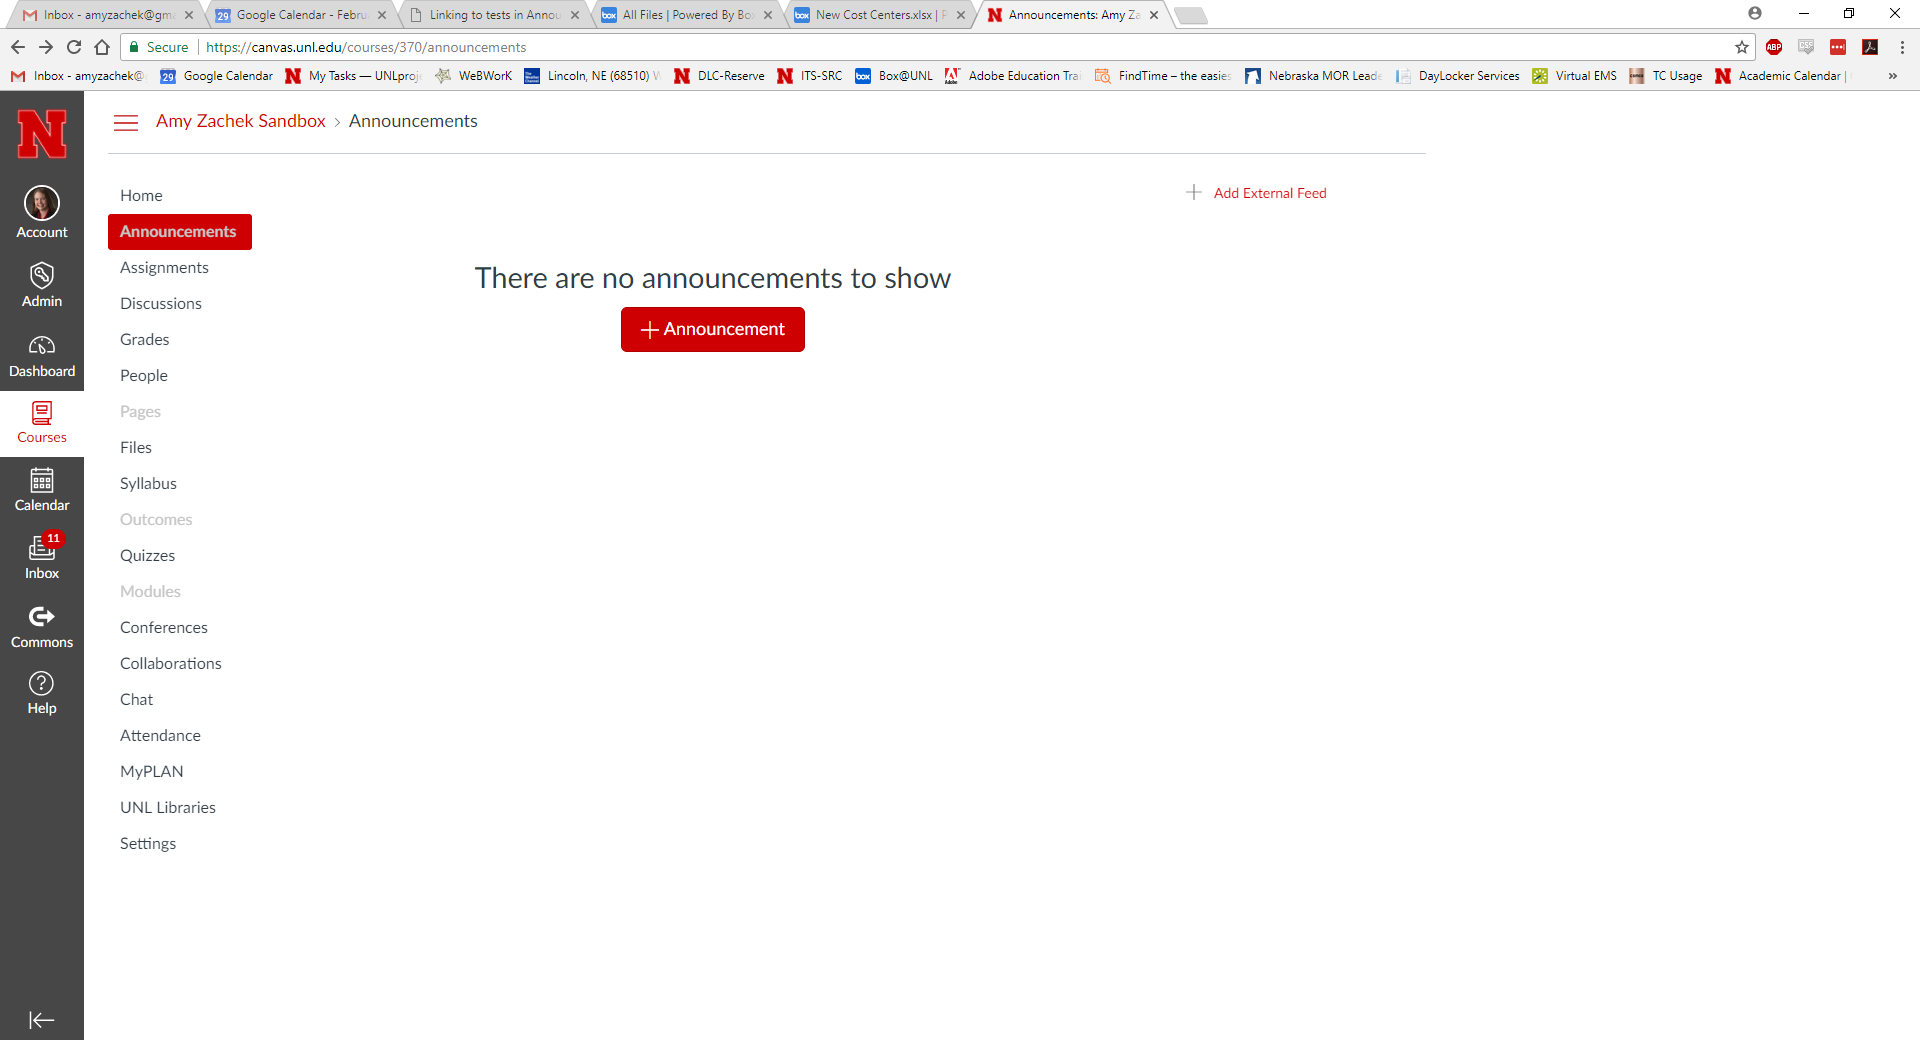
Using Announcements to Link to a Quiz
After a quiz is created, you can insert a link to the quiz using the Rich Content Editor. A course announcement with a quiz link is an easy way to help direct students to the test they need to take. You can do this by following these steps:
- Select Announcements in the course menu
- Click on “+ Announcement”
- Create the text for the announcement and highlight the word or phrase that you want to link to the exam

- Click on the Links tab on the right and expand the Quizzes menu
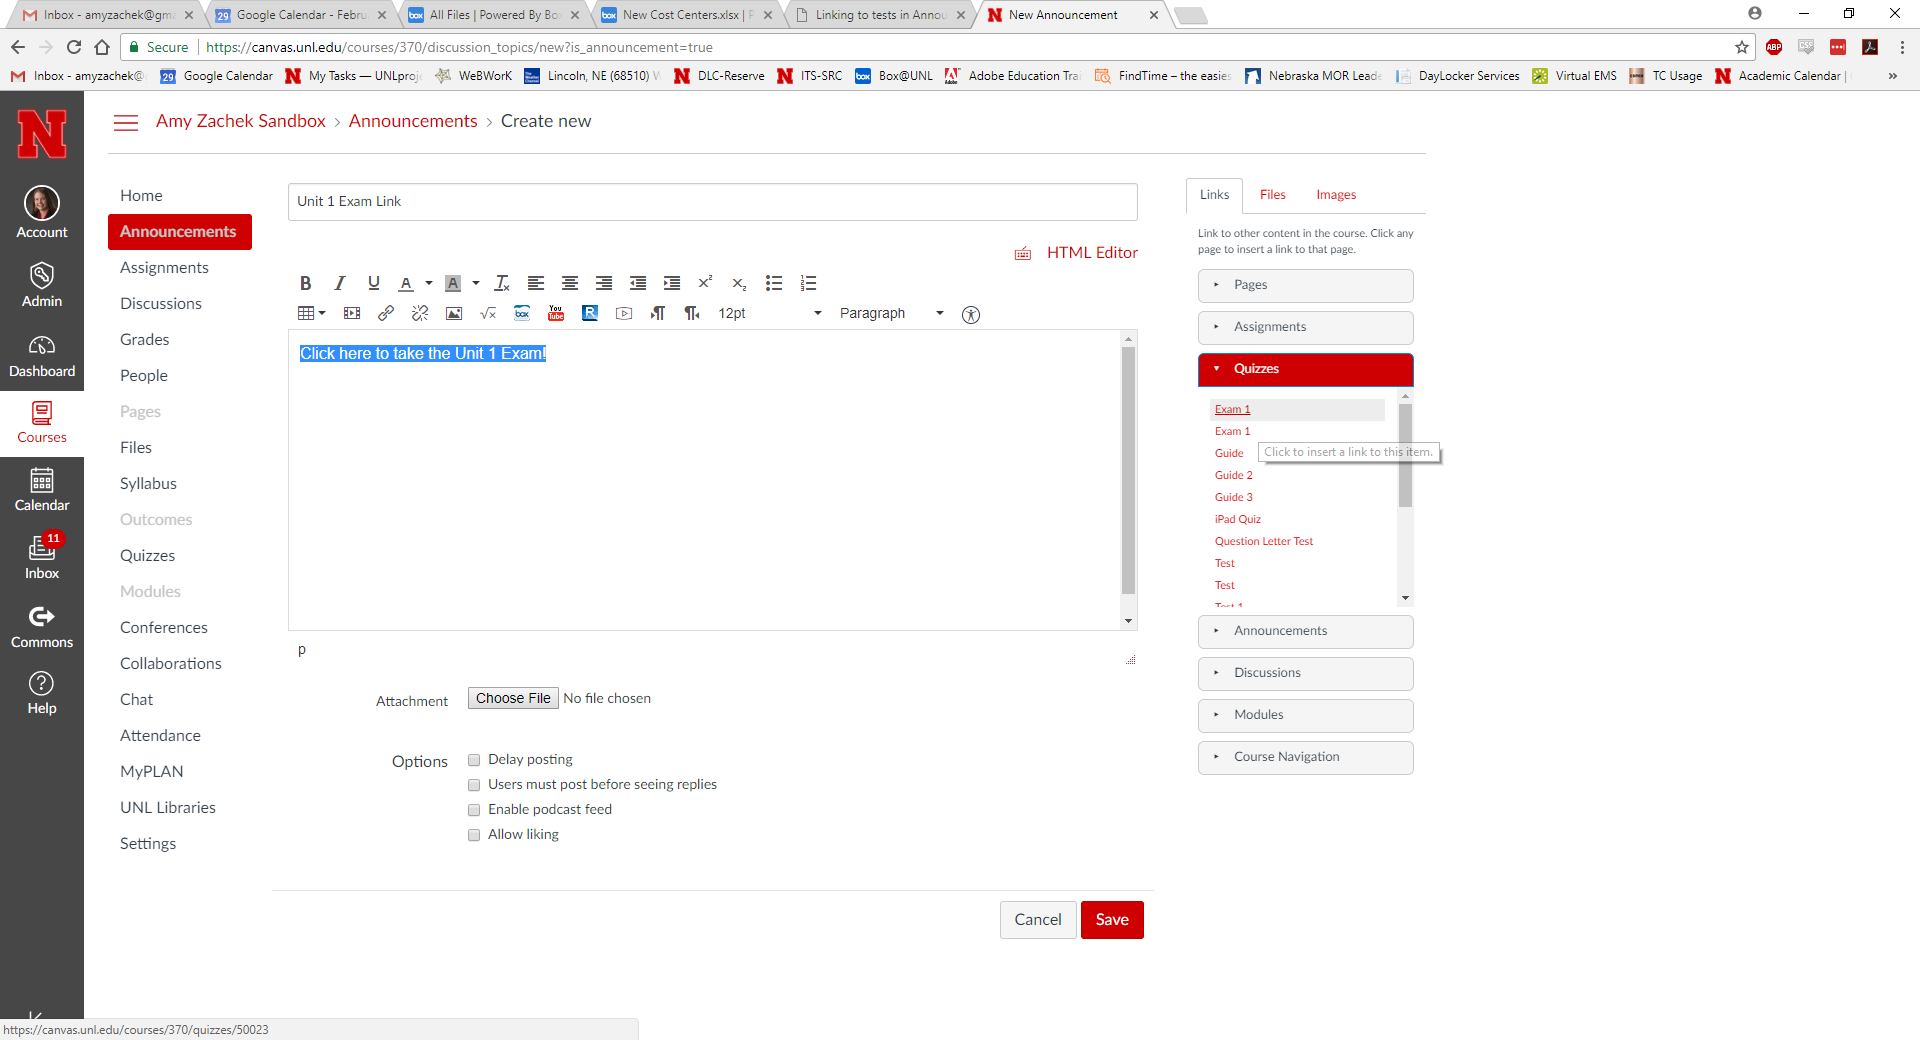
- Select the Quiz you want to link to
- The text will flash yellow and then change to red, indicating that it is now hyperlinked.
- Click “Save” at the bottom.
Copy a Quiz for a Remote Proctor
If some of your students will test at the Exam Commons and some will test off-campus, you will need to create a copy of the quiz and adjust the settings for remote testing. Naturally, you will want to wait to do this until you’re done fine-tuning your quiz. Here’s how to do this:
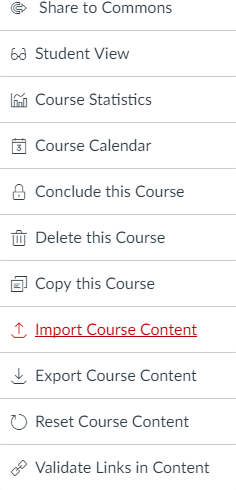
- Go to the “Settings” link on the left-hand side of your course
- Click “Import Course Content” in the menu on the right
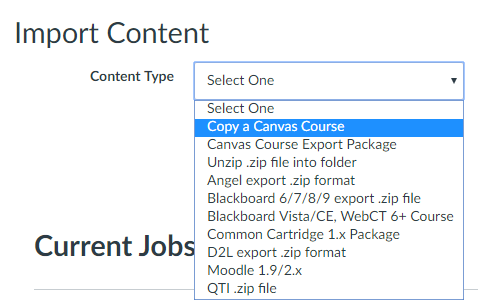
- Click the “Content Type” drop-down menu and click “Copy a Canvas Course”
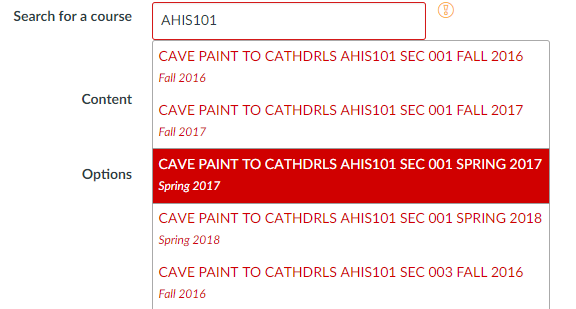
- Type the name of your course (i.e. AHIS101) into the search for a course field, and then click your current section
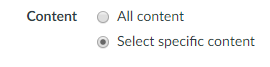
- Click “Select specific content” button in the “Content” section
- Click “Import”
- In the “Current Jobs” list, click the red “Select Content” button

- Click the right arrow next to “Quizzes,” and click the checkbox next to the quiz you wish to copy
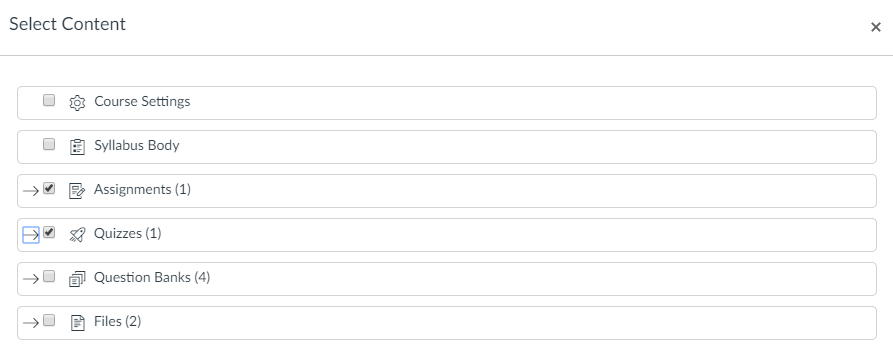
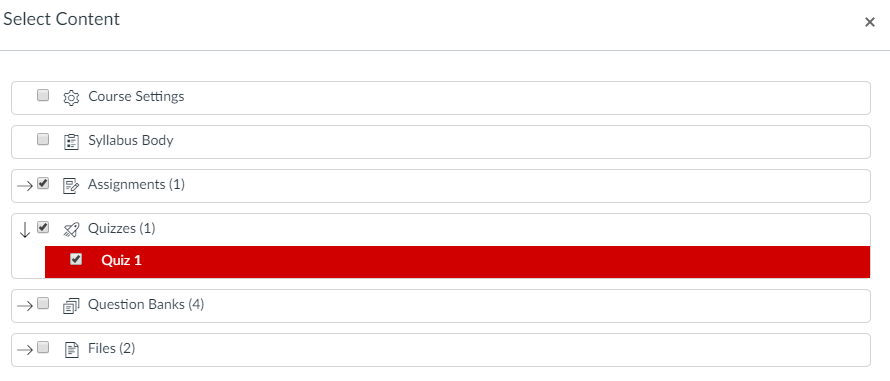
- Click “Select Content”
After this, the quiz will briefly display as “Queued” in the Current Jobs list, and then it will say “Completed” after it’s finished being copied. Now, you can adjust the settings on the quiz copy for your distance students. Here are those instructions:
- Navigate back to your Quizzes folder to find a copy with the same title
- Click the copied quiz and click edit

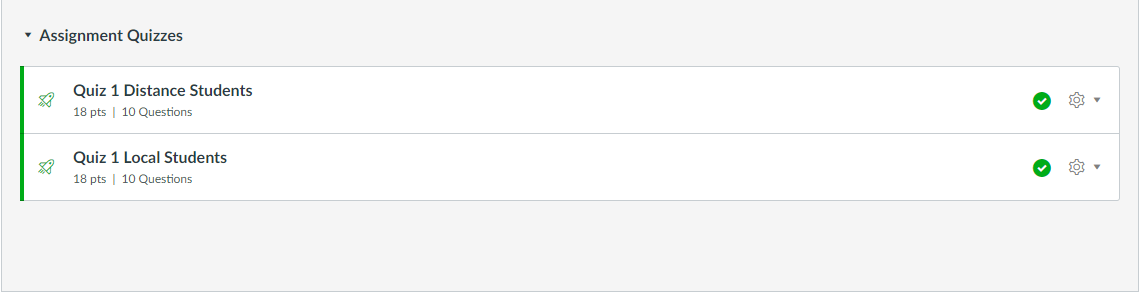
- Change the title to something that makes this recognizable as the distance version, such as “Quiz 1 Distance”
- Deselect “Filter IP Addresses”
- Check “Require an access code” to create a password (remember that this password must be communicated to your distance proctors!)
- This step is optional, but if you want you can assign this version of the test to certain students so that only your distance students see this version of the exam. However, this isn’t truly necessary because only one version of the exam will work depending on where a student is taking it from.
- Hit “Save” when you’re done.
- You may also want to change the title of the other exam to something that makes it recognizable as the local version to be taken at UNL.
Remember, you do not need to make a copy for students using the SSD Testing Center. The “UNL Testing Centers” filter includes IP addresses at both the DLC and SSD testing centers.
Adding Extra Time for Students with Accommodations
If you have a student who is registered with the SSD office as having an additional time accommodation, you must pre-set their extra time in Canvas. If you are using Mobius Assessment for your exams the extra time will be added on site by staff in the DLC or SSD testing centers, but it must be added in advance for Canvas quizzes. Here’s how to do it:
- Go to your Canvas course.
- Click the title of the exam which you would like to extend time for a particular student
- Click “Moderate this Quiz” in the upper-right hand corner
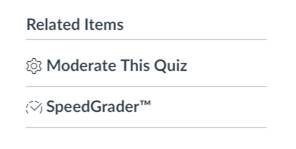
- This will take you to a screen with a list of your students, and you can click the edit icon to the right of the student to whom you would like to give extra time.
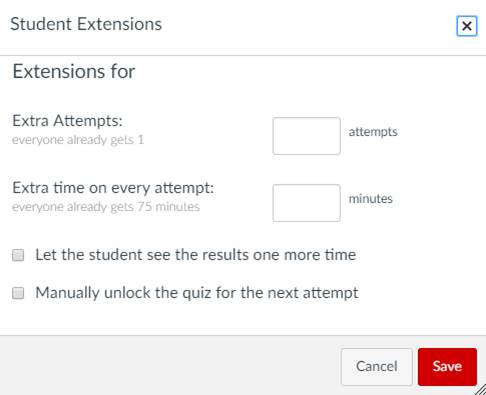
- On the dialog that pops up, just type in the amount of extra time they should receive for every attempt, and hit save.
Note: This will need to be done for every individual quiz or exam that this student will be taking, and cannot be applied globally to a student’s account.
Giving a Student an Additional Attempt
Additional attempts may be added in the same “Moderate This Quiz” section where extra time is added (see the previous section). Situations where an extra attempt may be needed could include if a student encountered unexpected technical difficulties on their first exam attempt, or if a student taking a multiple attempt quiz accidentally click on and began their next attempt immediately after the first.
Extending Exams for Some or All Students
For Some Students
- Schedule a makeup request on http://dlc-reserve.unl.edu
- Extend the quiz dates through the last day of the makeup request in Canvas so that it’s available when the student(s) come in to test
- If the student has already used their attempt and will be getting a “redo,” add an additional attempt for them in the “Moderate This Quiz” section of Canvas
- If the student has not used their attempt (this is more common, as makeups are typically requested for students who have had trouble finding a time to come to the Exam Commons and test), no further action is required.
For All Students
- Contact the Exam Commons Manager to add additional days to your original exam request
- As soon as this is done, students will be able to see and sign up for times on the newly added days
- Extend the quiz dates through the last day of testing in Canvas so that it’s available when the students come in to test
Quiz Statistics
After students have started taking your quiz, a new link option will appear. You will now be able to access detailed Quiz Statistics about your quiz! To see this, follow these steps:
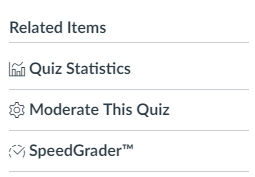
- Click on your quiz title in Quizzes
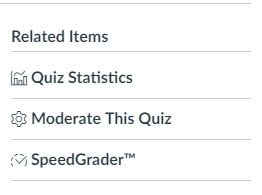
- In the “Related Items” menu on the right, click “Quiz Statistics”
- This will show a summary page that includes the average, high, and low scores, standard deviation and average time of your exam. You can also download Student Analysis and Item Analysis documents, filter by section, and see a thorough question breakdown when you scroll down past the score graph.
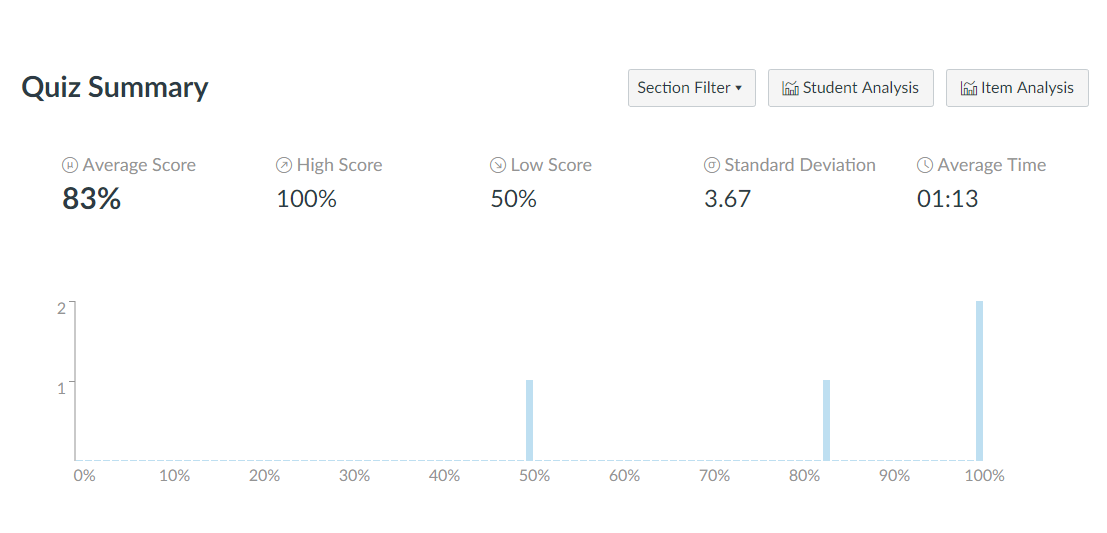
Note: Not only can this information be used for improving your quiz questions, but you can also use the average testing time data to consider adjusting your testing time. For example, on multiple choice exams many students have very short average testing time spans compared to the maximum allowed time. Shortening this time helps the Exam Commons to maximize scheduling within its space, allowing more instructors the chance to schedule online exams in the facility.
MOBIUS ASSESSMENTS
For More InformatioN
Please visit the following link for more information about creating Mobius Assessments:
